Quick Start Guide
The default user/password for connecting to the Sixaola’s configuration web page is osop/test. Please change these for all of your Sixaolas. The default user/password for connection by ssh is root/root OR root/sixaola. Please change these too.
Warning
If you assign a public IP to your Sixaola and do not change the password, your Sixaola will be hacked.
This guide is specific for a Sixaola3 or more recent (e.g., Sixaola4), printed on the Sixaola card right above the little Panama flag and next to the RF shields.
You will need at least the power cable and an ethernet cable. The GPS cable is optional. This guide assumes that you have a Linux or a Windows computer and know how to use it. Mac users should find it easy to follow too.
Let’s begin:
Step 1) Power up your Sixaola.
When you power the unit up for the very first time you will see the two power LEDs turn on and stay on. A third green LED should begin to flash. This flashing LED indicates that the unit is trying to connect. See here for more on LEDS: LEDs.
Step 2) Connect to your Sixaola.
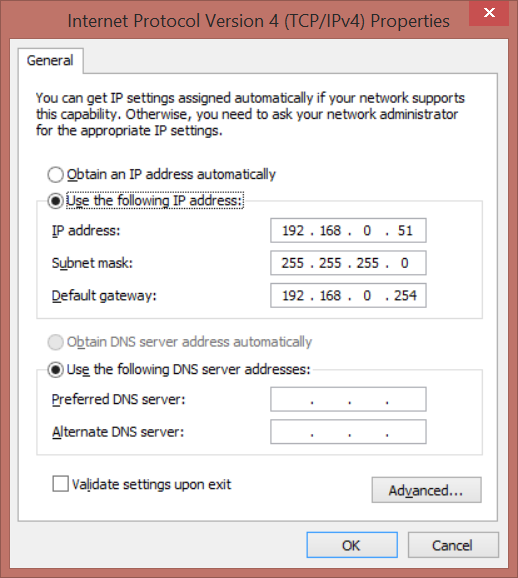
In order to connect to your Sixaola, you will need to assign your computer the IP 192.168.0.51 and subnet 255.255.255.0.
Under Ubuntu :
First disable DHCP. Then, in a terminal, execute the following command:
$ sudo ifconfig eth0 192.168.0.51 netmask 255.255.255.0 up
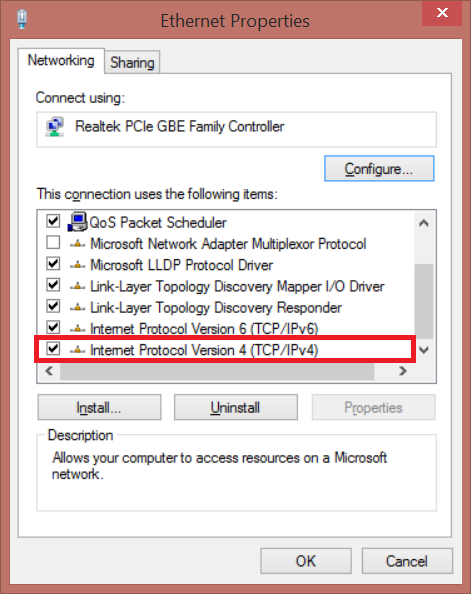
Under Windows :
Open the Control Panel and navigate to Network and Sharing Center then choose Change Settings. Right click on your Ethernet connection where you have your Sixaola and go to Properties.
Search for Internet Protocol Version 4 (TCP/IPv4) and double-click on it.
Fill in the form as shown below:
Step 3) Ping 192.168.0.50.
Now that you have configured your computer to connect to the Sixaola, run an Ethernet cable from your computer directly into the Sixaola.
Note
You should not need a “cross-over” cable. Any normal Ethernet cable will do. Most modern laptops and computers do cross-over automatically.
Now ping the Sixaola’s “Discovery IP”: 192.168.0.50. It should respond.
Step 4) Open a Browser to view Sixaola’s home page.
Open a browser and navigate to the Discovery IP. The Sixaola’s home page should appear.
Note
The Sixaola’s home page was developed for use with Chrome. You can use another browser but things might look strange.
Step 5) Start configuring your Sixaola.
You should see:
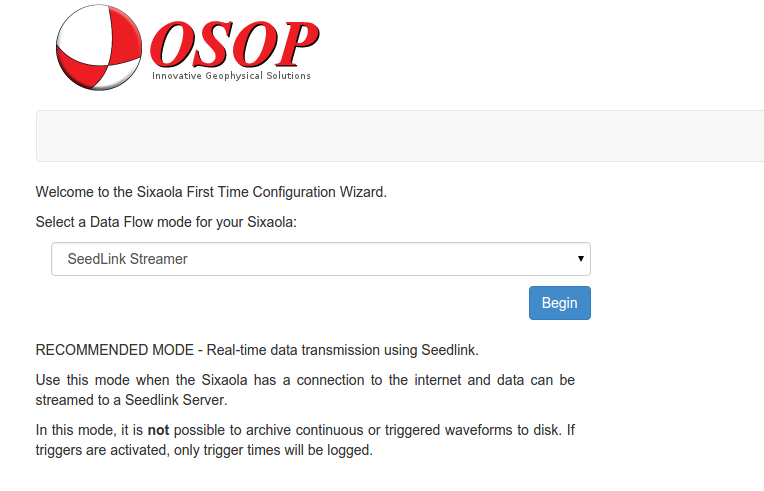
Click on BEGIN to configure your Sixaola in SeedLink Streamer Data Flow Mode. You should get this page:
For more details on Data Flow Modes see: Data Flow Mode.
Note
The Sixaola adheres to the FDSN Seed Manual for network, station and channel naming conventions: see http://www.fdsn.org/ & Station SCNL for more details.
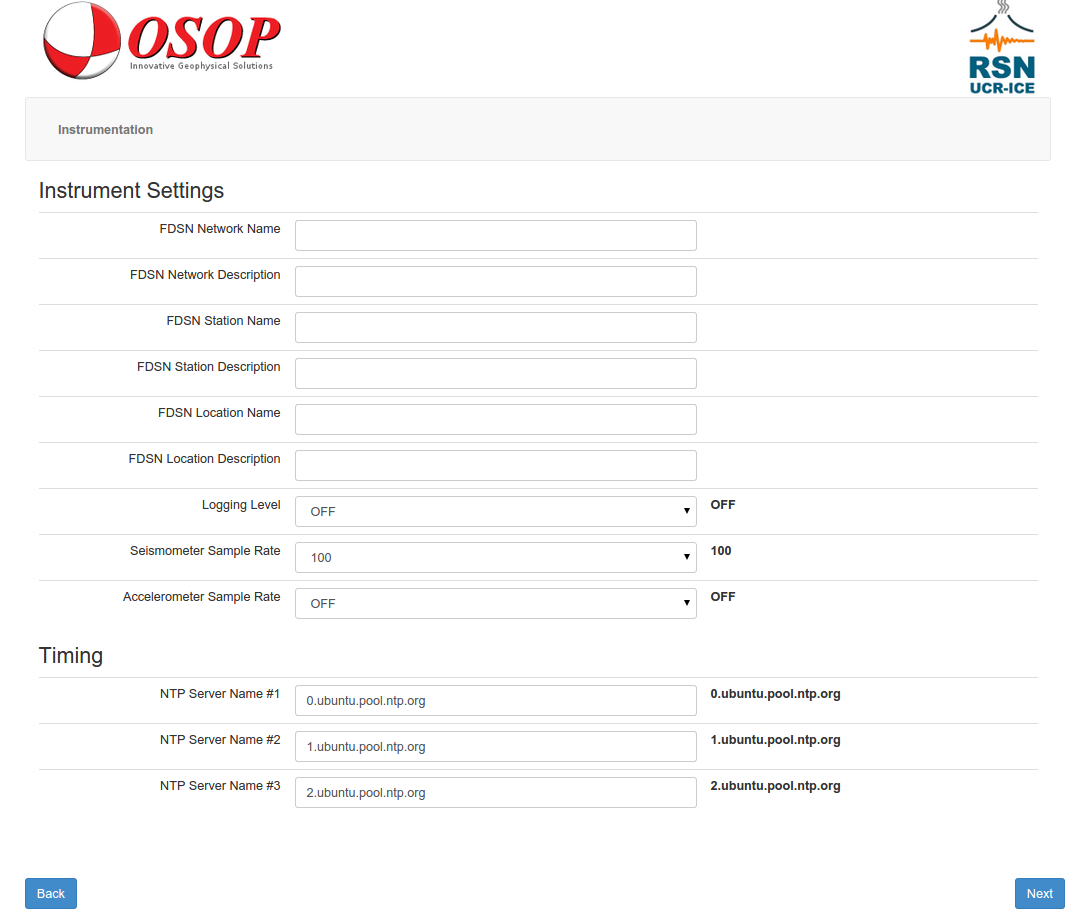
FDSN Network Name: The two letter code assigned to your network by the FDSN, for OSOP it is “PA”
FDSN Network Description: This is a free text area, you can leave it blank. For OSOP you might type “Volcan Baru Network”
Warning
Do not use Latin characters such as ó, é, í, … This warning applies to all fields.
FDSN Station Name: This is the name of the station, can be up to 5 characters and cannot begin with a number. For example, OSOP’s international broadband station is called “BRU2”
FDSN Station Description: This is a free text field, you can leave it blank. For example, “BRU2 vault at Barriles Panama”
FDSN Location Name: This is a two character code that distinguishes between co-located sensors of the same type, for example “00” and “10” are commonly used to distinguish STS-2s and STS-2.5s or Trillium 240s at GSN stations.
FDSN Location Description: This is a free text area, you can leave it blank.
Logging Level: ON or OFF. Turn ON only if you have problems.
Seismometer Sample Rate: At OSOP we prefer 50 samples per second (sps) because it saves bandwidth and works very well for regional and local earthquakes. Your options are 100 or 50 sps. If you are not sure what to put, choose 50.
Accelerometer Sample Rate: Unless your application requires the accelerometer, set it to OFF.
NTP servers: You can set this to use your institute’s NTP server(s). If your institute does not have an NTP server, we recommend setting these to point at NTP servers located in your country. Read more about Sixaola’s timing options here: Timing.
Click on NEXT and you will get this screen:
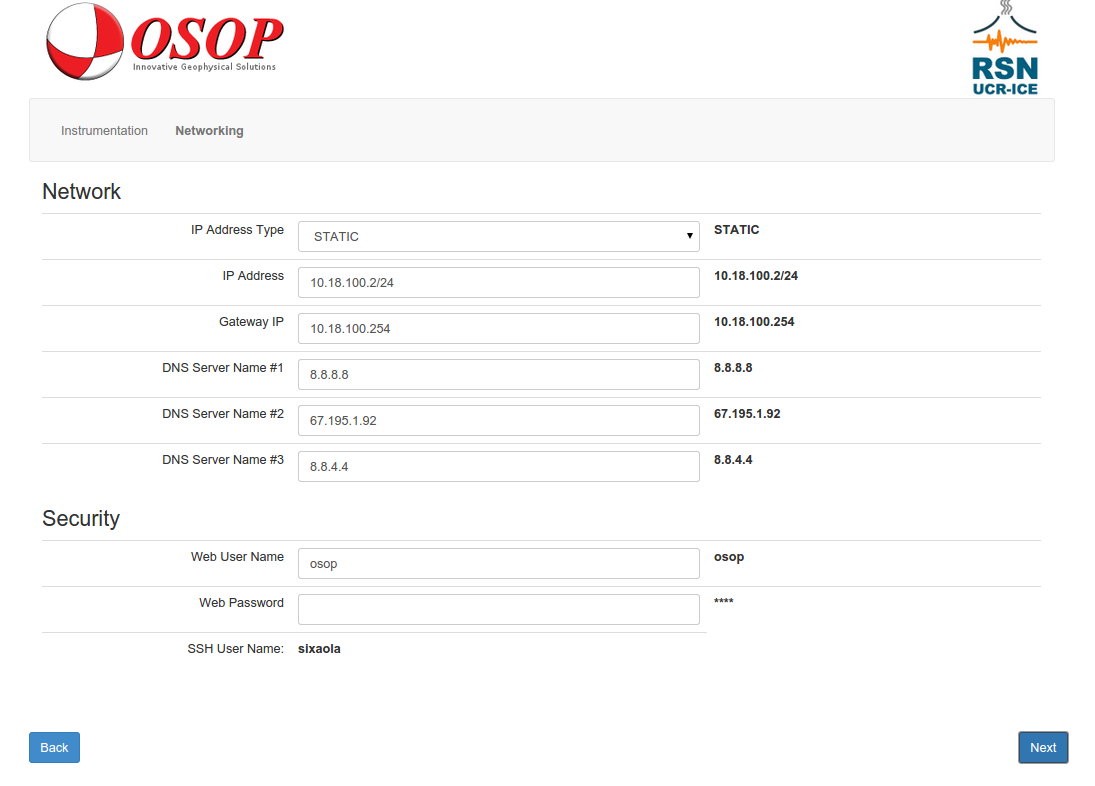
This page should be quite self explanitory. In most cases you will be choosing to use a dynamic IP. For more on networking with the Sixaola, see: Networking
Please change the security settings with a user name and password of you choice. This password is for the web interface. Remember to write your username and password down!
Warning
The Static IP must be accompanied by the Network Type and have the format IPv4/CIDR. For example,
10.18.100.5/24
Not sure how to configure this? Talk to your system administrator or use “24”
Click on NEXT and you will get this screen:
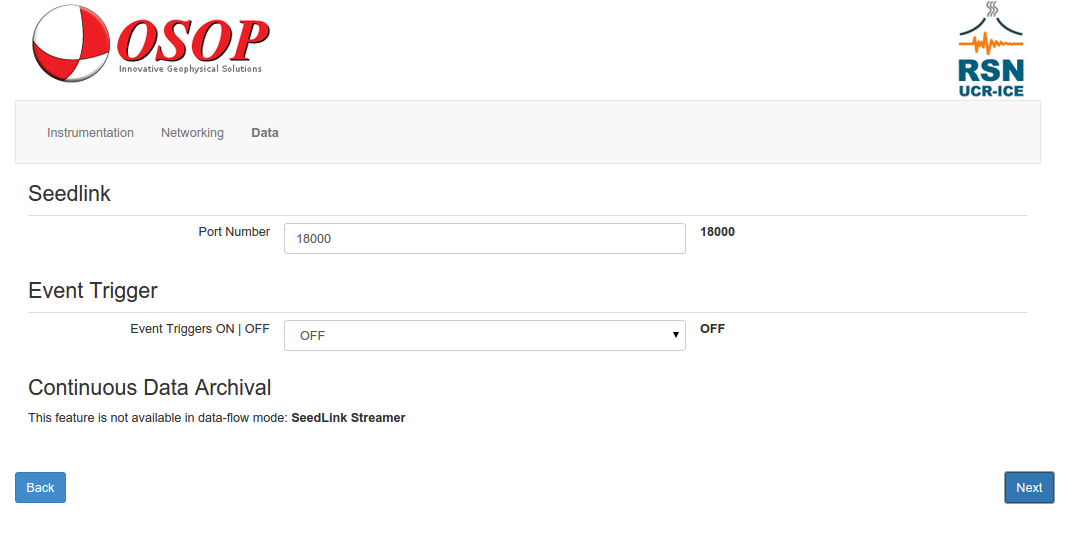
Note
By default, the Sixaola is set to Seedlink Streamer Mode on port 18000. Unless you have a good reason to change the Port Number, leave it at 18000. Similarly, unless you have a good reason, leave the Event Triggers OFF
Click on NEXT and go to to this screen:
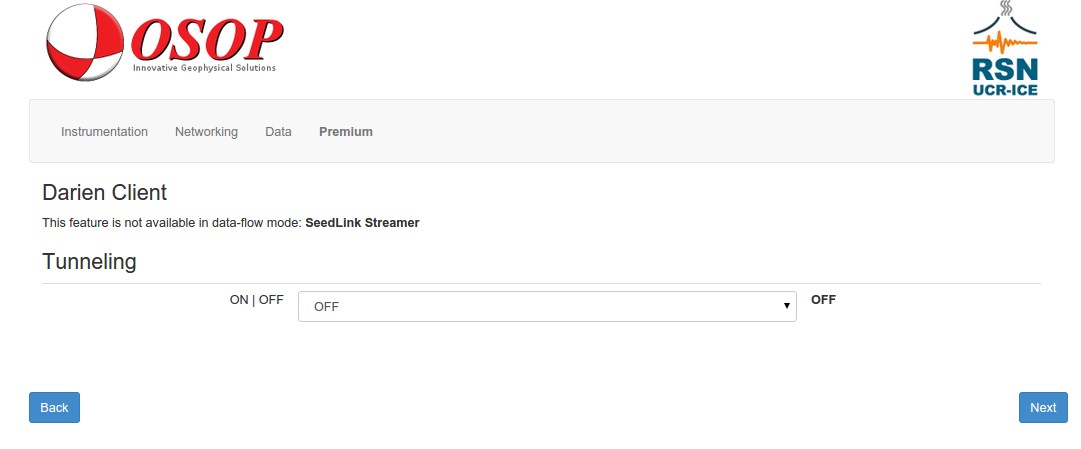
Both the options of Darien Client and Tunneling are paid premium feature. If your Sixaola will be behind a network firewall, you might need to consider purchasing tunneling. See here for more information on Premium upgades: Premium: Paid Software Options & Accessories
Click on NEXT
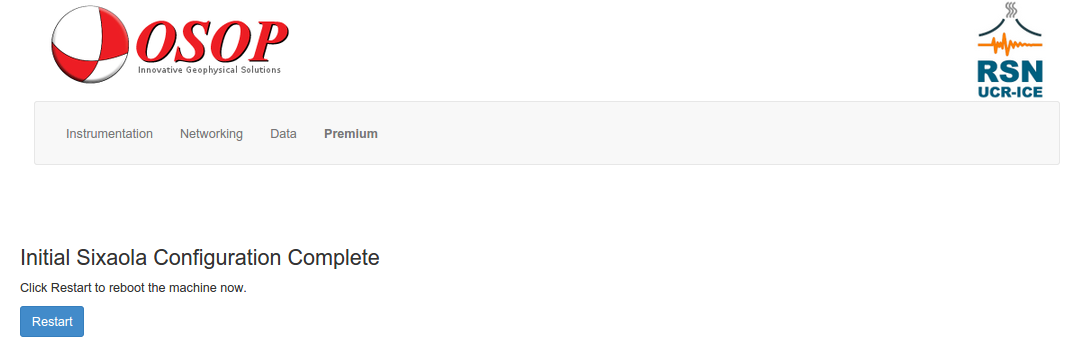
You are almost done, just click on Restart. This will take a few minutes. When your Sixaola reboots, it will adopt your new configuration. You can return to the web interface and make changes at any time.

The web interface should reload on it’s own after a few minutes. In some browser versions, it may not refresh as expected. If it does not refresh automatically after a few minutes then close it, open a new browser and enter the Discovery IP again.
See here for how to visualize the waveform data using SeisGram2K (a third-party program): How to Visualize the Waveforms.
Need help? No problem. Email OSOP’s support team at support@osop.com.pa.