In this manual we refer to the Raspberry Boom as “RBOOM” and the Raspberry ‘Shake and Boom’ as the RS&BOOM.
Note
All models of Raspberry Shake, including the RS1D, RS3D, RS4D, RBOOM, RS&BOOM and RJAM use the same software. Sections of the Quick Start Guide have been tailored to each product but the overall manual applies to them all. Other specific manual sections, like this one, have been created to address issues specific to the individual products.
Note
The RBOOM was discontinued in 2023. The final version of the RBOOM was V5.
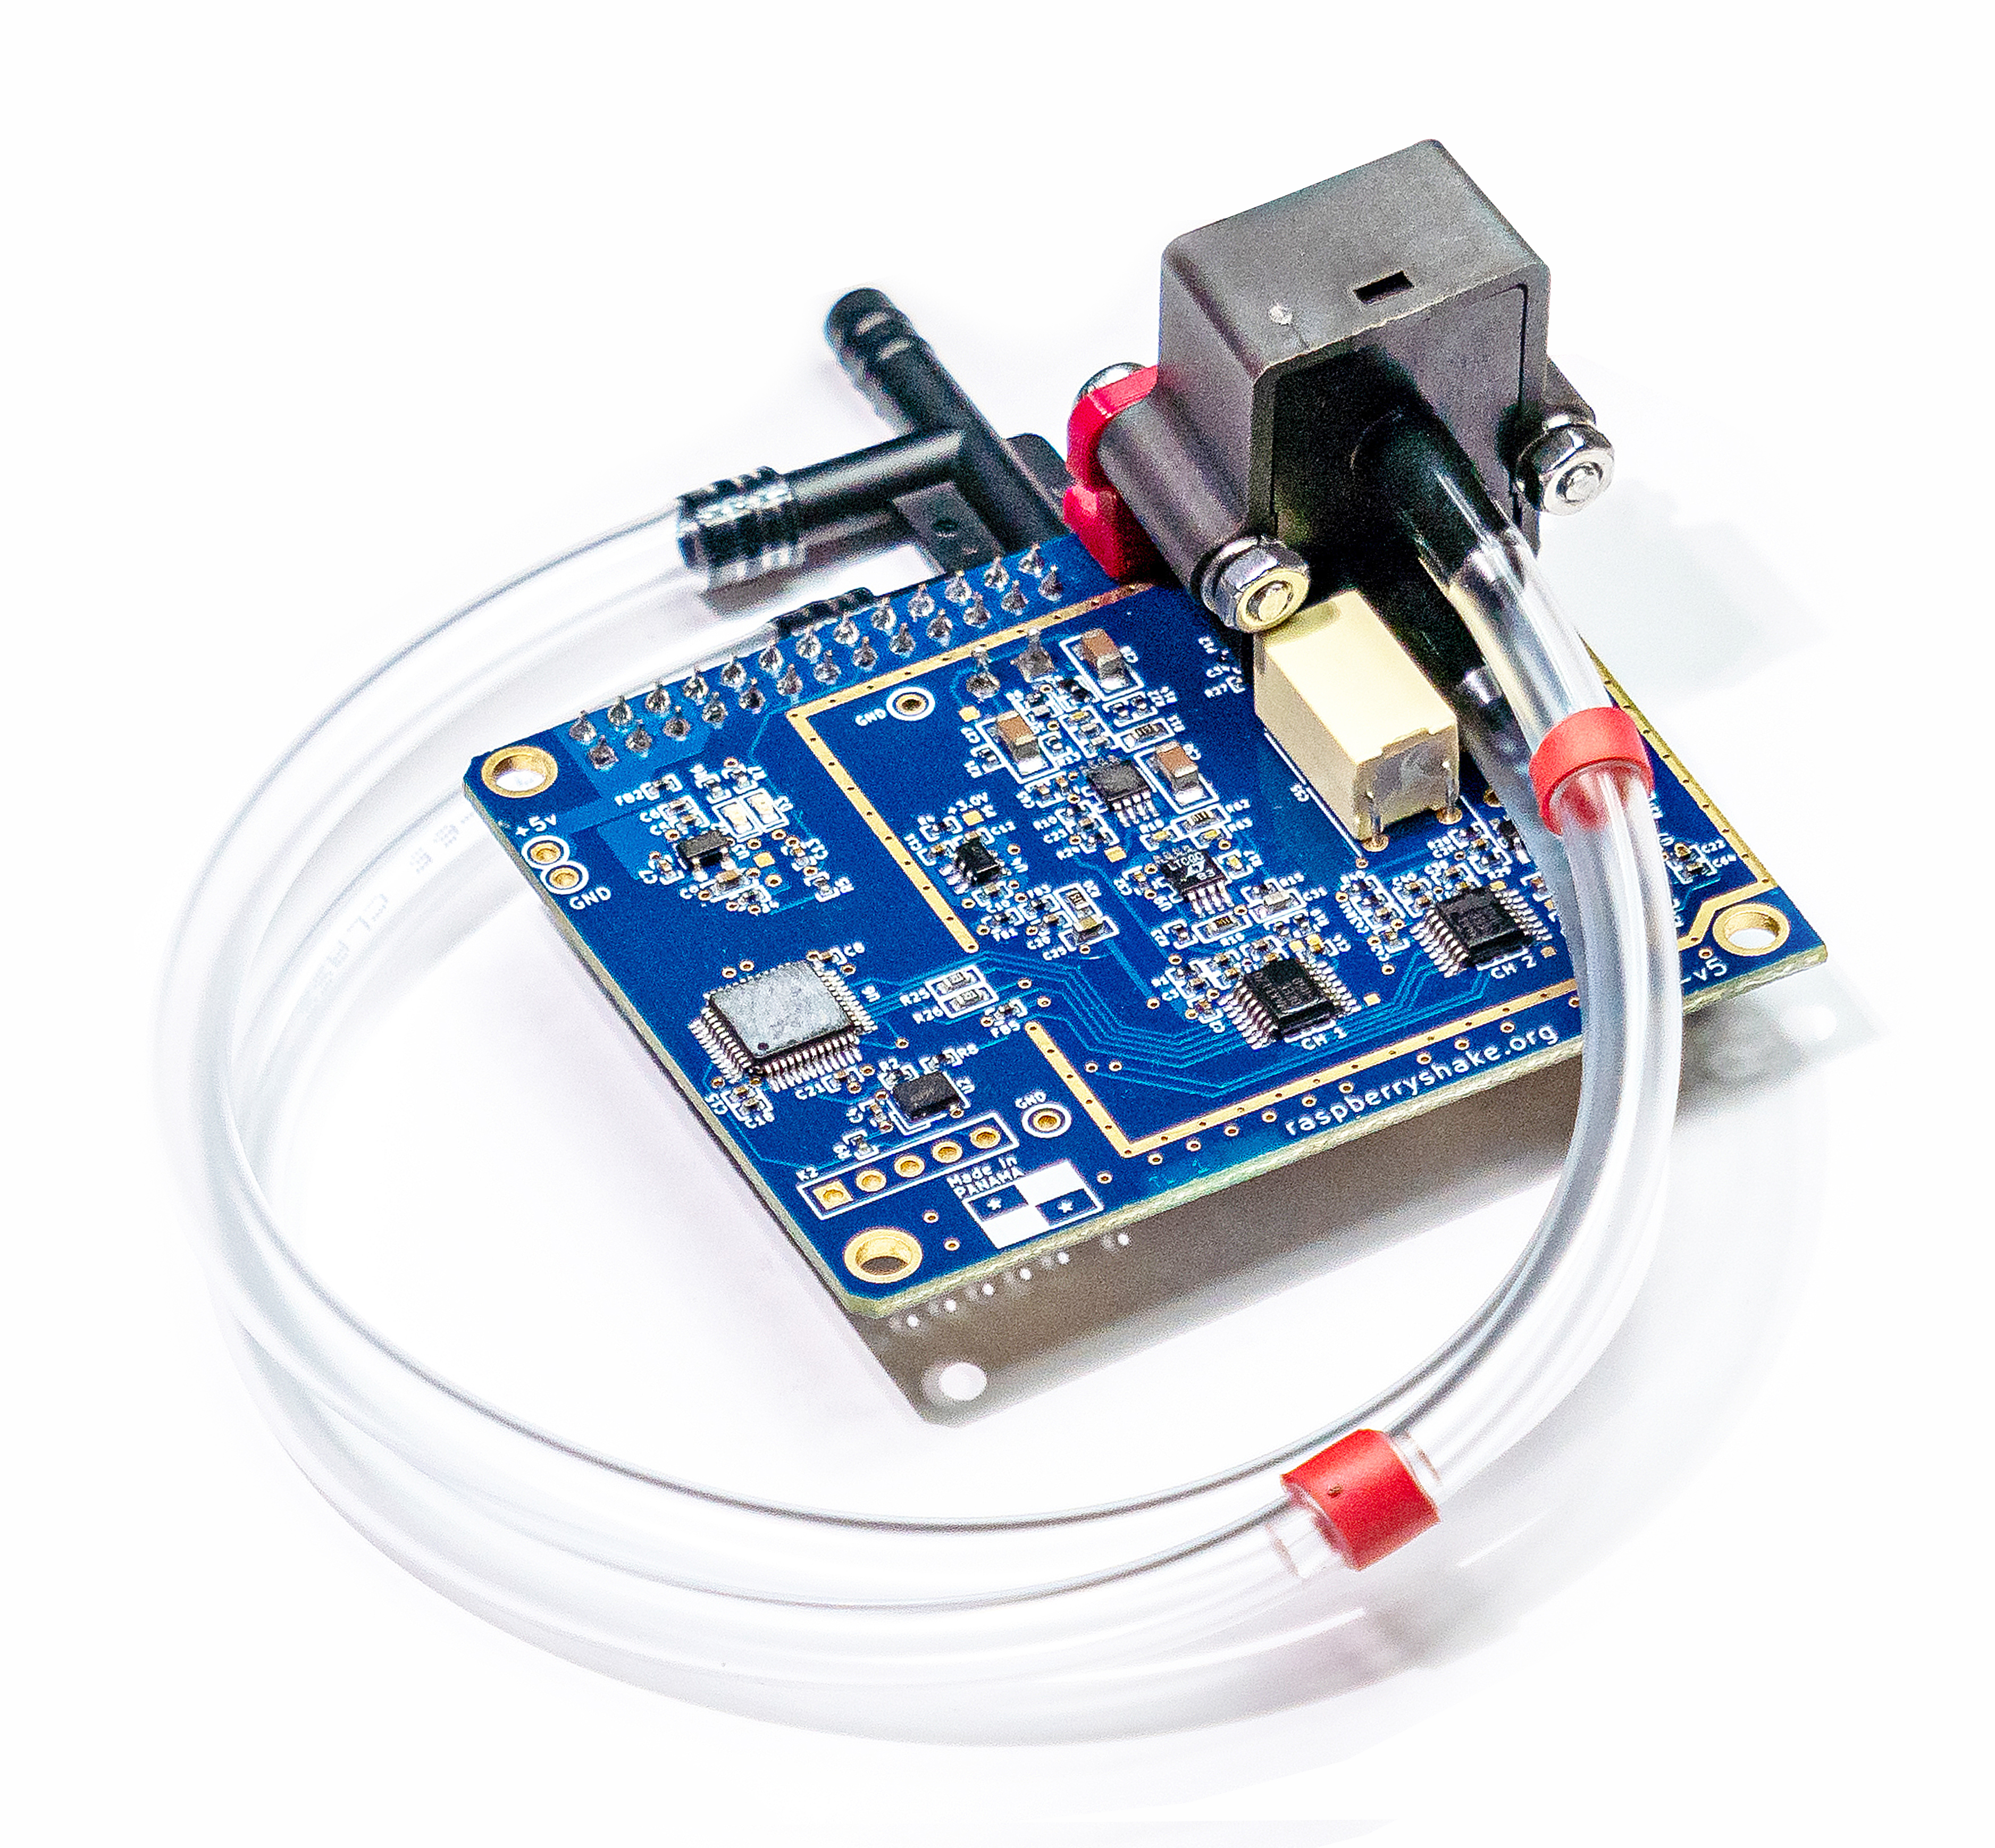
Note that the RBOOM and RS&BOOM share the same PCB board (We plan to update the photos at shop.raspberryshake.org soon ;). It is not possible to populate the “Shake” or seismograph part of the board post-facto.
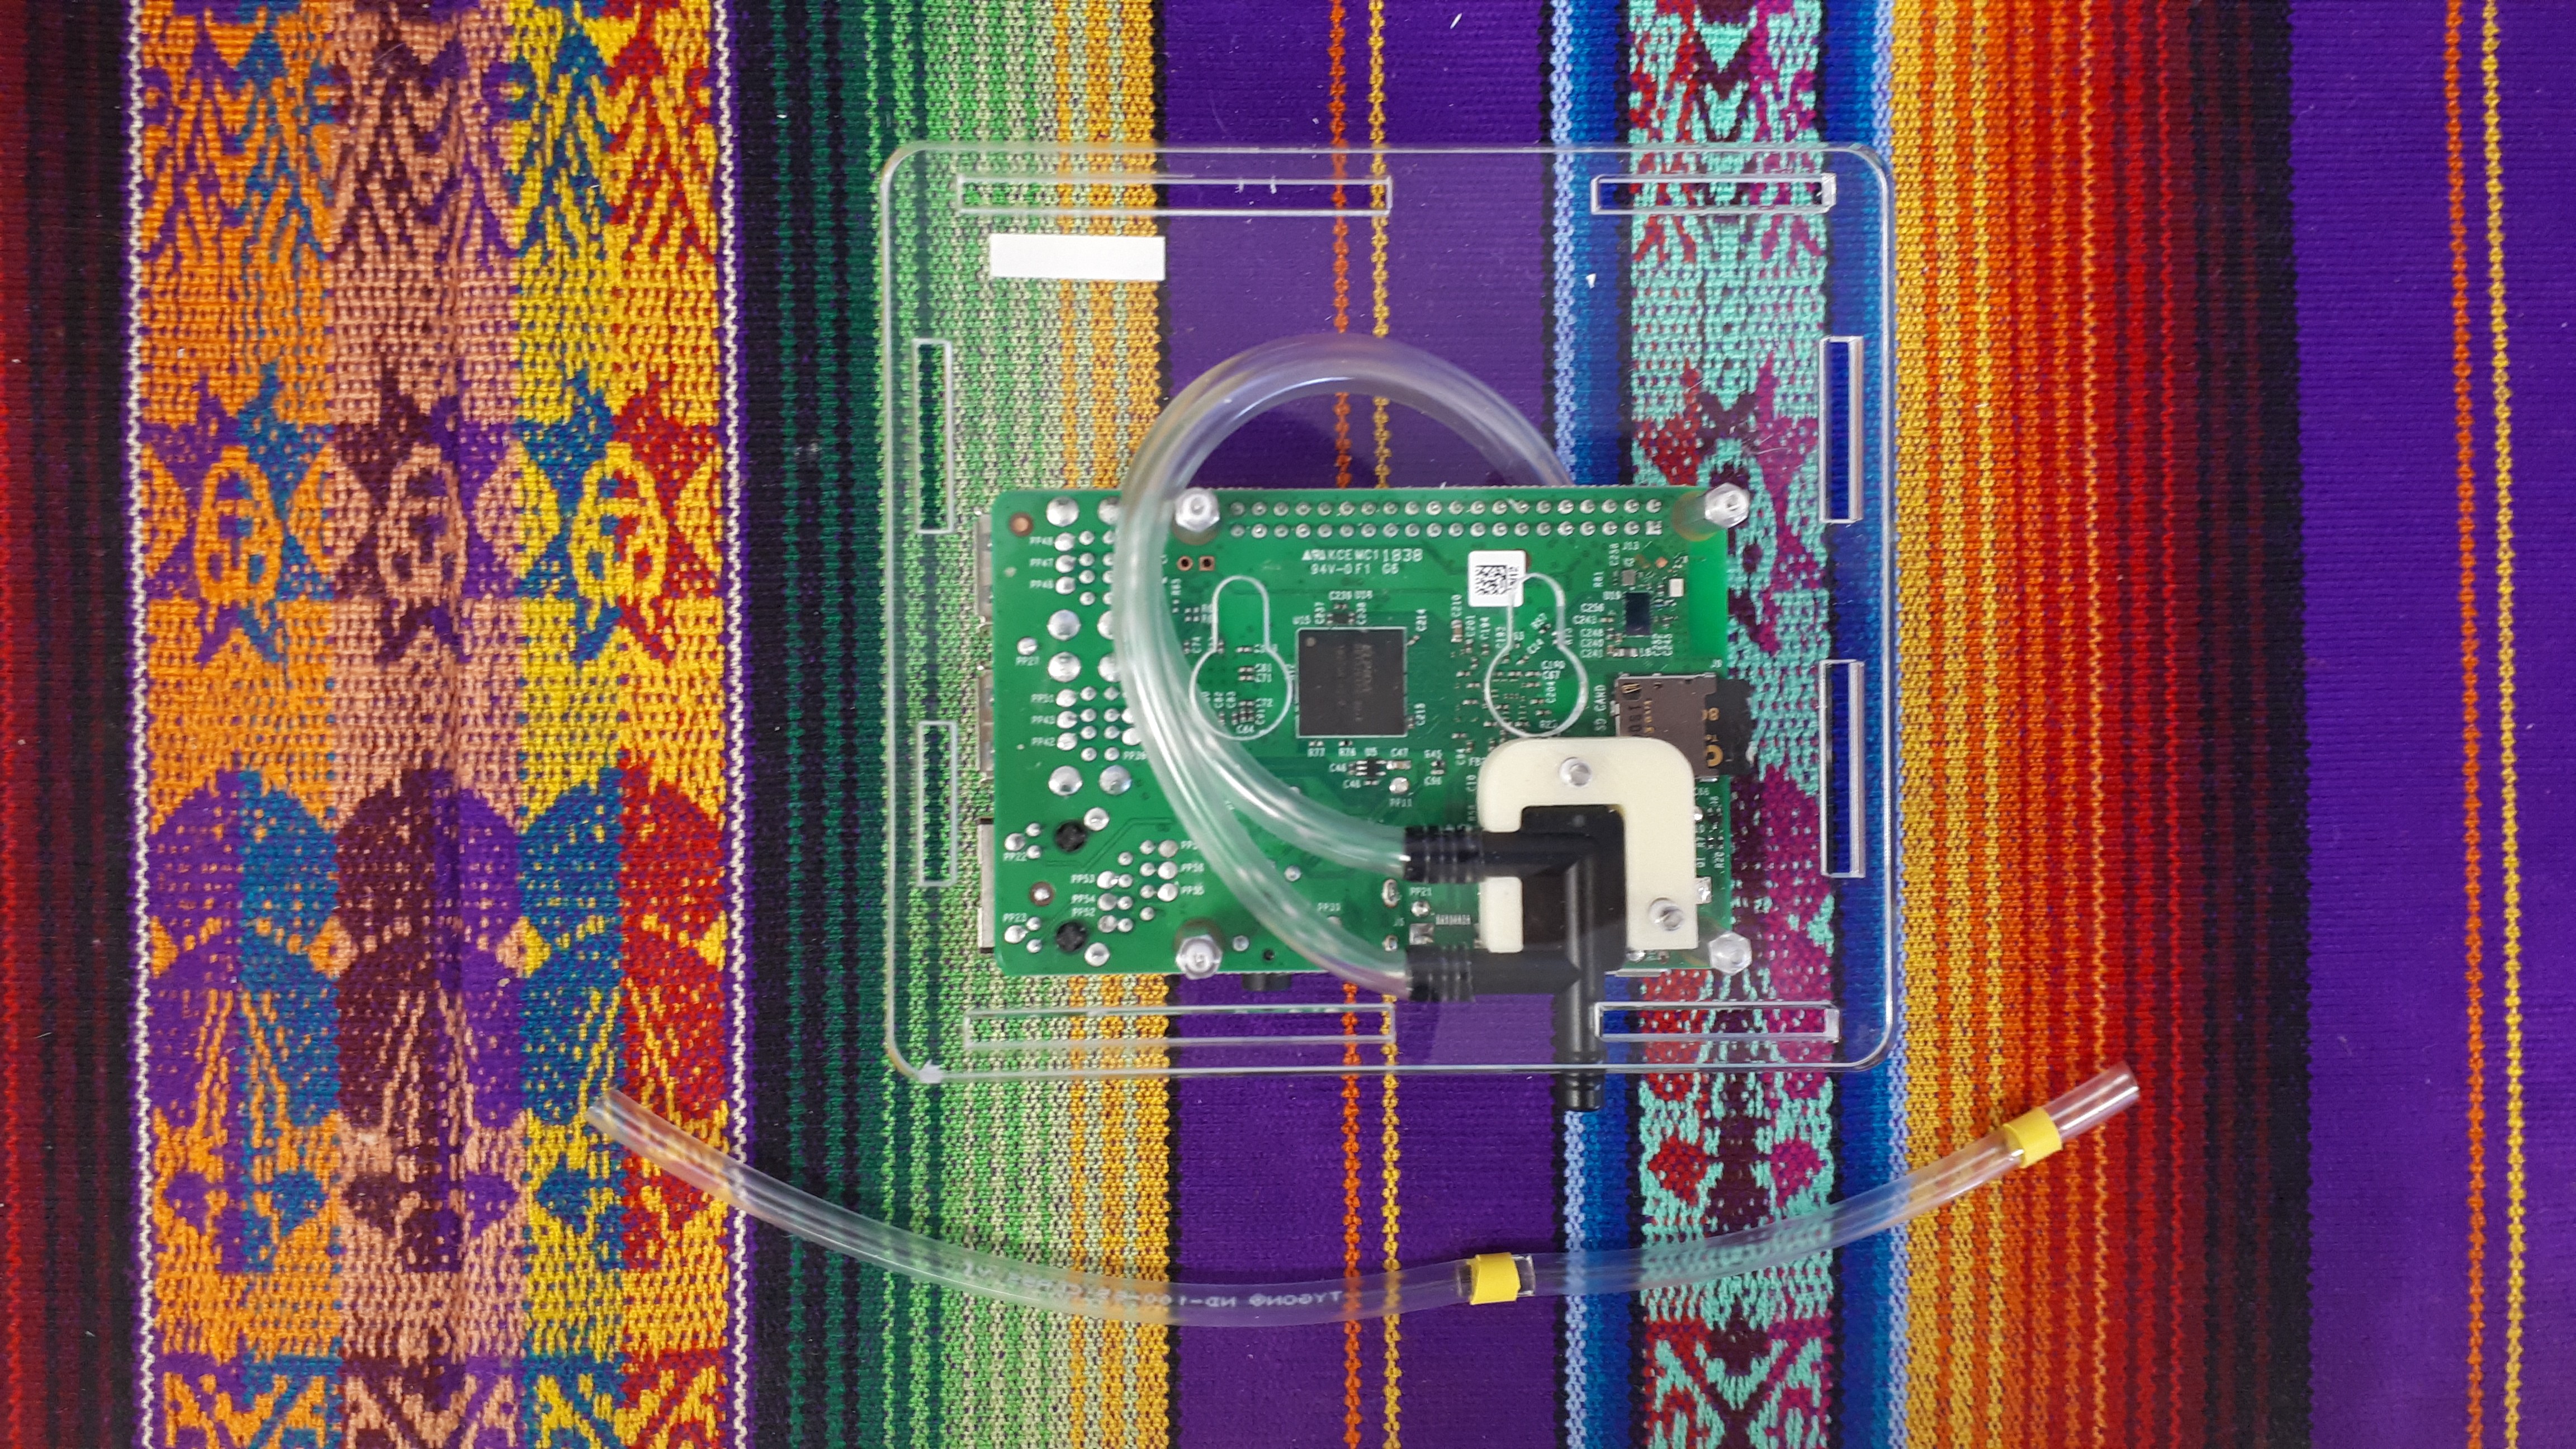
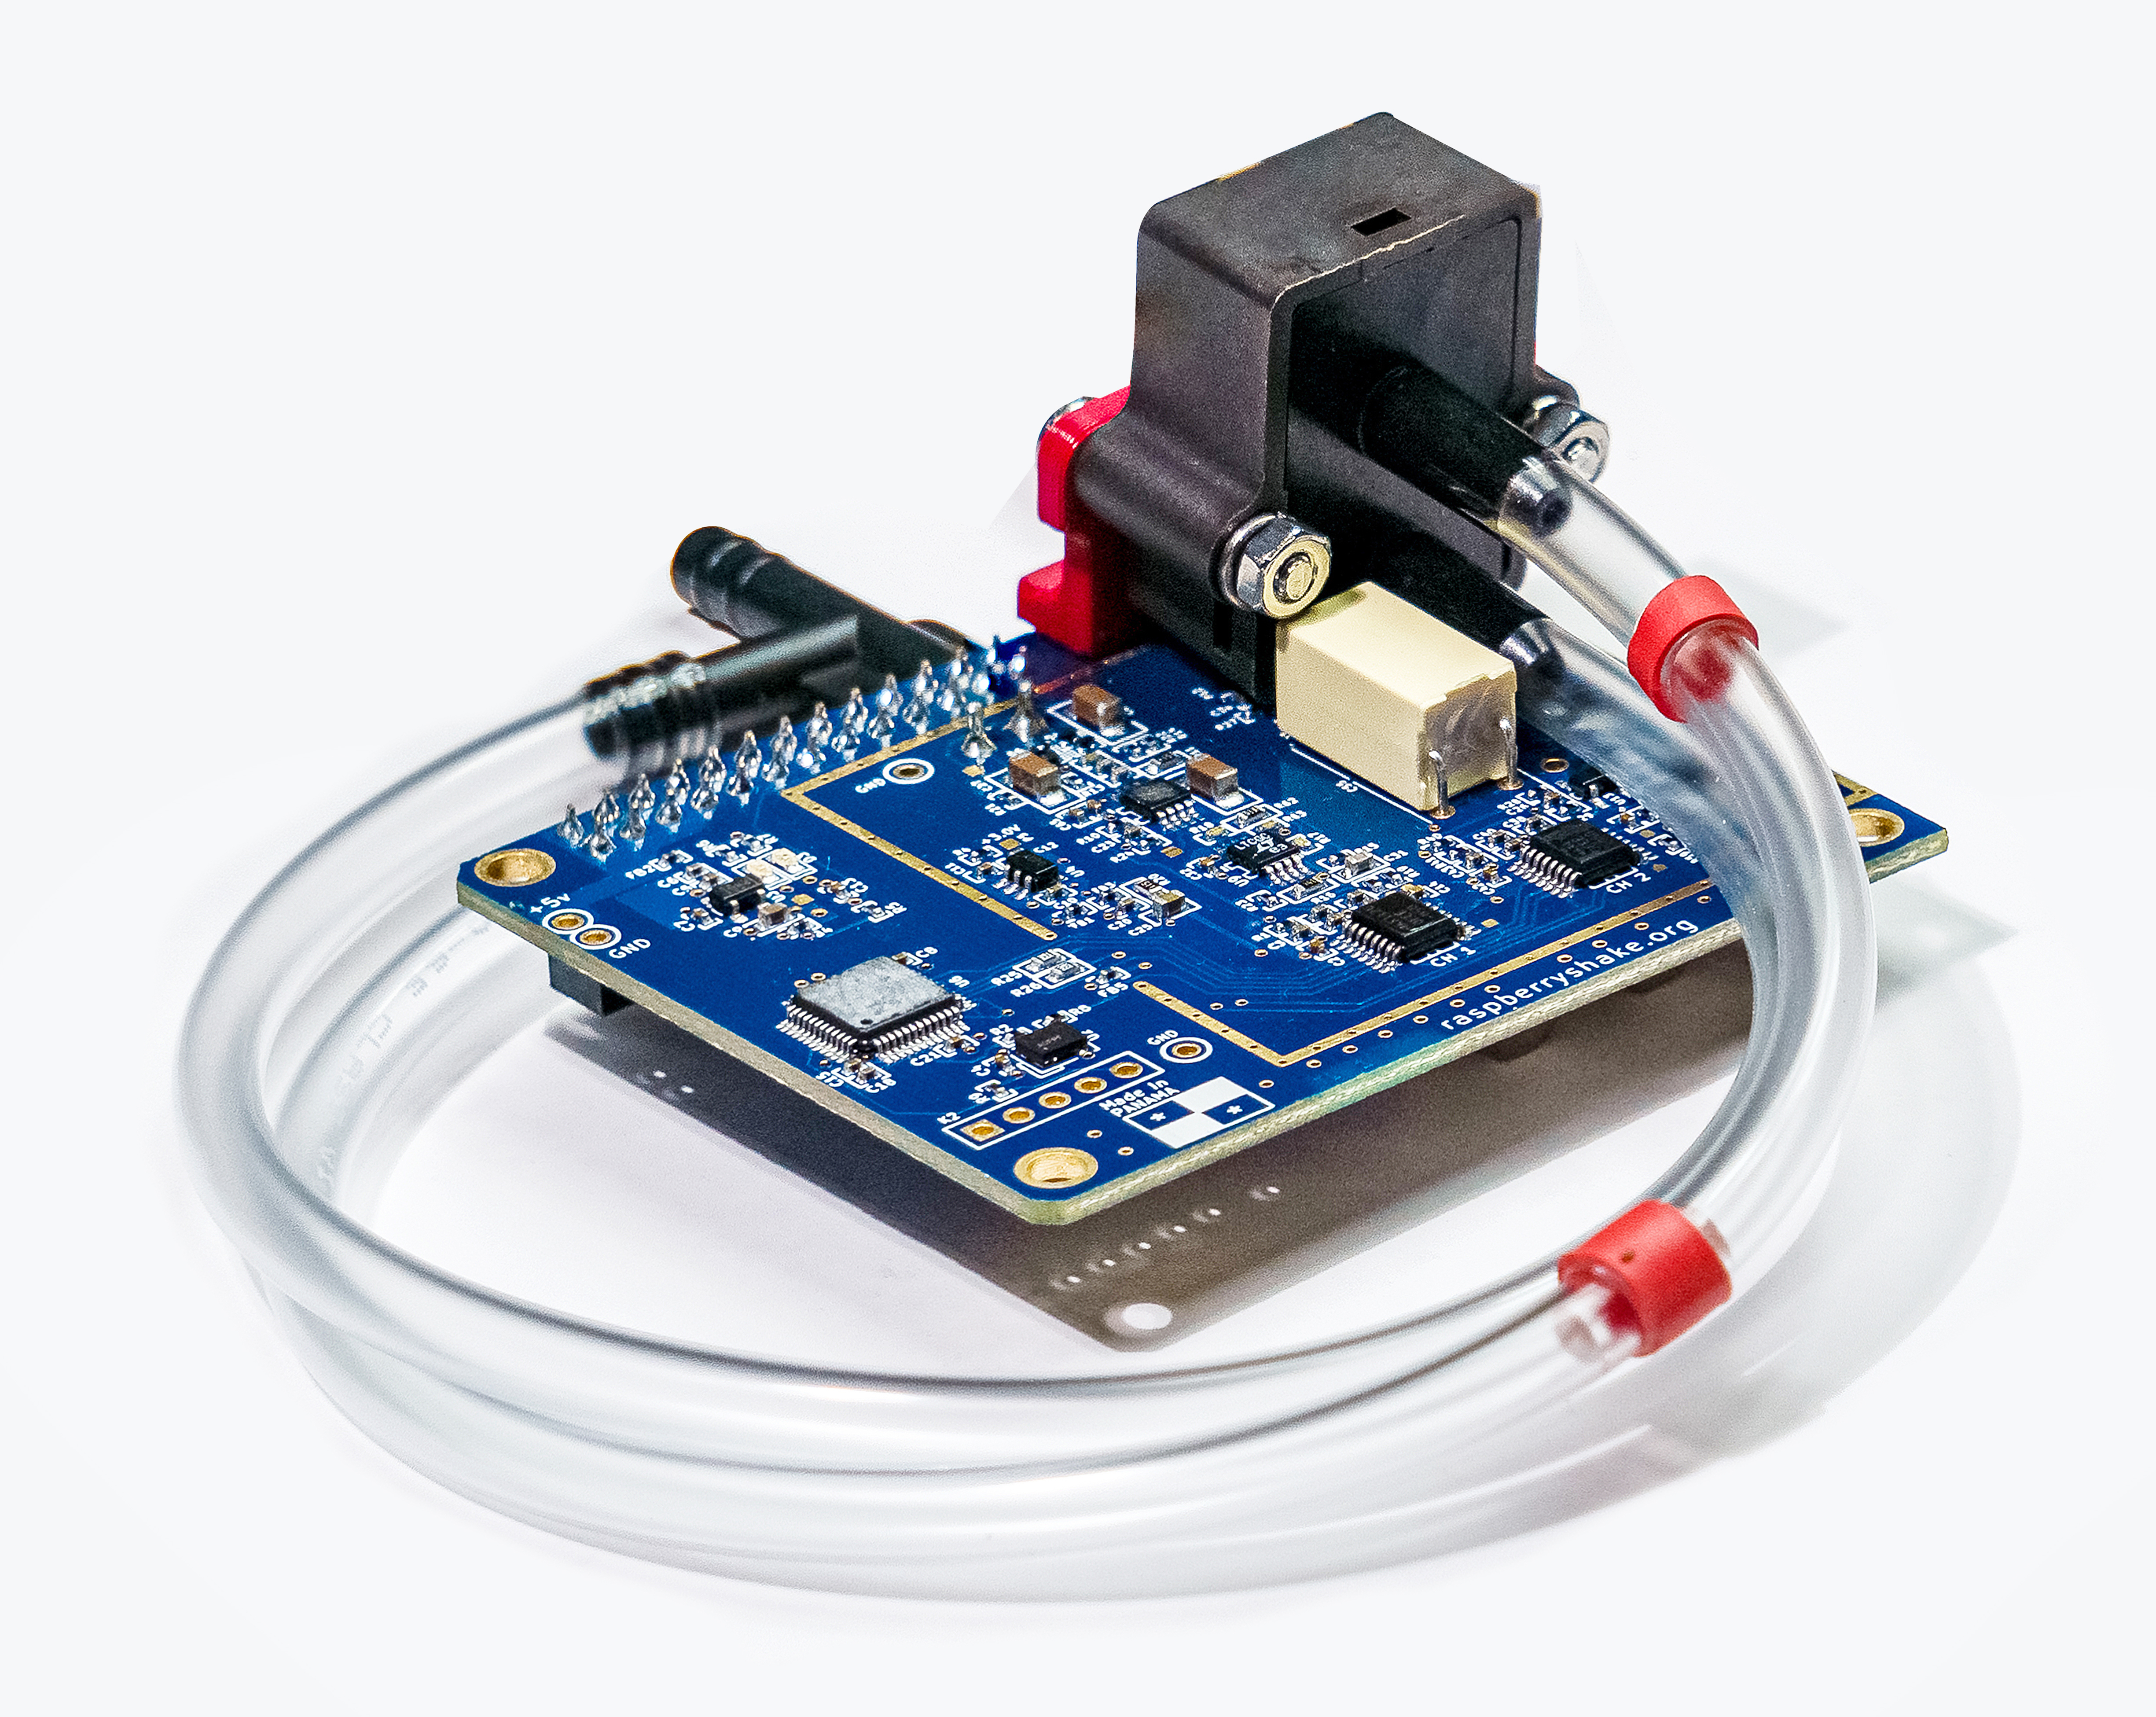
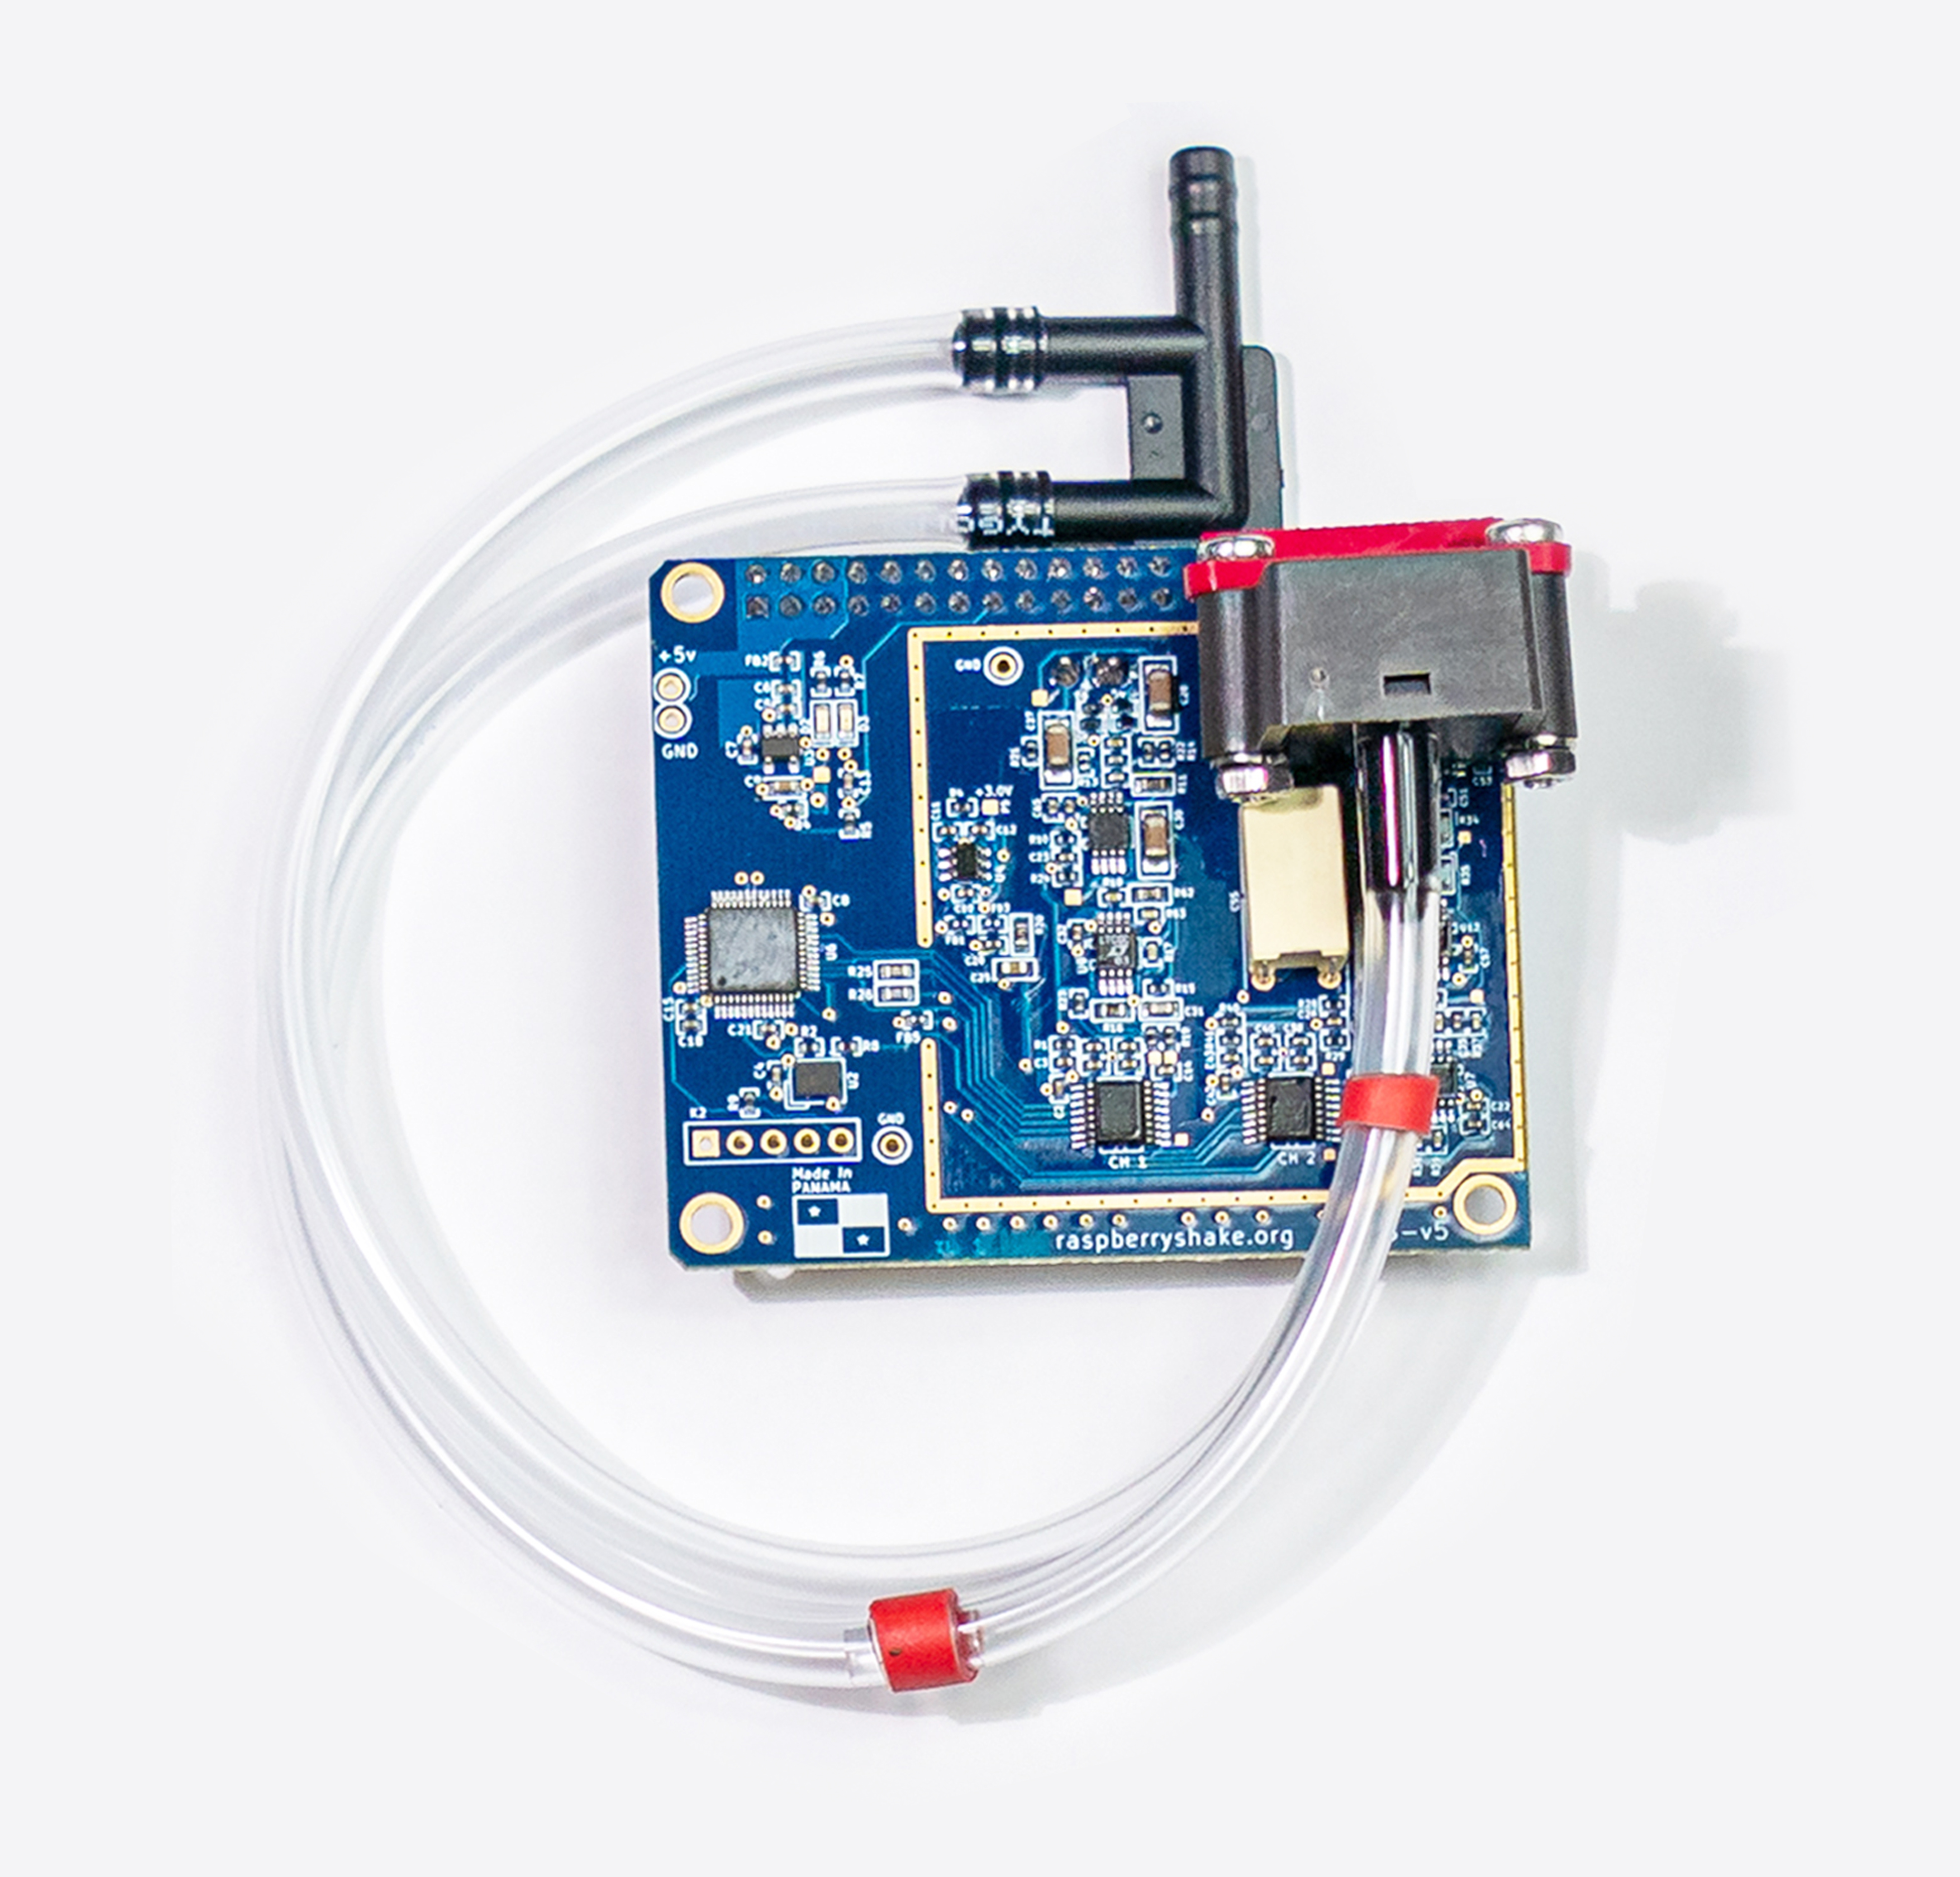
The RBOOM and RS&BOOM use a differential pressure transducer with two inputs (see the black thumb-sized box soldered to the top of the board). In order for the RBOOM to work properly, one input must be open to the atmosphere and unperturbed. The other input creates a single-pole high-pass filter, allowing us to filter out unwanted long-period noise. We call this the “mechanical filter”. You will notice that there are two clear plastic tubes running from the sensor to a nipple on the outside of the box. One of the tubes is labeled with a color band and has a small glass capillary inside.
The RBOOM ships with one mechanical filter at 1 Hz (labeled by a red band). This comes pre-installed. A 20 seconds filter (yellow band) is available at no additional charge. If requested after delivery, additional shipping charges will apply.
We ship with the default 1 Hz filter as it is the most appropriate for our hobbyist users. But feel free to request a 20 second filter and then install it. If you do, please make sure to update the settings in the web configuration and save those settings.
Irregardless of the filter used, there is a second single-pole high pass filter at 20 seconds embedded in the electronics.
Warning
It is not possible to assemble the red and yellow filters in series, this will generate erroneous readings from the instrument.
Warning
It is not possible to attach the mechanical filter tubes to the outer nipples of the instrument, only empty tubes.
The mechanical filters come in 2 colors: red (installed by default, included by default with order, 1s) and yellow (not included by default with order, available upon special request, 20s).
Note
To get the correct polarity, you will want to take care to install the filters as shown in the photo (below). Make sure that the banded end of the tube is attached to the sensor.
Warning
Be very careful when attaching the tubes. If you use excessive force, the sensor will break off the board. We recommend holding the sensor and not the board when connecting the tubes. As always, use proper ESD protection.
Warning
Avoid kinks in the tubing during assembly. The tubing should maintain its full diameter, uncompromised by kinks for its entire length.
The RBOOM is sensitive to temperature but not orientation nor leveling. The RS&BOOM, because it has a built in seismometer, must be leveled.
Feel free to install your RBOOM inside or outside.
If you install the RBOOM inside a house, it will be sensitive to the opening and closing of windows, doors and ventilators as well as internal house vibrations - fridges, feet etc.
The Raspberry Shake board, if left uncovered, will produce some long-period wander. To ensure the highest quality signal, always operate the Raspberry Shake inside of the enclosure provided by Raspberry Shake or your own.
If you live in an air-tight home, you will want to attach an extension tube to the RBOOM’s nipple and run it outside. Mounting a tube on an external building wall will be very sensitive to the wind, particularly at the longer periods. Ideally, you want to get the tube well away from any buildings, trees, walls, etc. See the next section for some Do It Yourself wind noise reduction ideas.
We recommend using a flexible polymer tubing with an inner diameter of ~3.8 mm. Here is an example of what we use: Example Tubing. Some words of caution: When attaching the tube extension, consider that the elasticity of the tube will change with temperature, so opt for a tight fit. Large swings in temperature could also result in condensation inside the tubing which could block the passage of air. So it is best for the majority of the tubing to remain indoors where temperatures are more stable and that only a small bit of the tubing is exposed to the outside. Be aware that the tube itself should be protected from external forces. It will pick up even very light bumps and vibrations from the walls, the ground and anything else it touches. Even wind blowing over it can show up in the readings. You might fill the end of the tube with steel wool or a similar material to reduce wind noise and keep the bugs out. The tube should be mounted at a downward angle to keep water out.
If you do not live in an air-tight home, then you do not have to use extension tubing. The RBOOM and RS&BOOM will work perfectly fine without any tube but be prepared to see air conditioning, heater systems, opening and closing doors and many other in-doors events, which is all part of the fun.
Wind is the most common type of infrasound noise, especially below 2 Hz. Wind noise reduction is the biggest challenge and biggest impediment to successful infrasound monitoring. It is just part of the game: If you want to measure infrasound, you have to fight the wind! You can get a feel for this by installing your RBOOM or RS&BOOM outside on a windy day. If you are interested in experimenting with wind noise reduction, you can try any of the following low-cost, Do It Yourself (DIY) strategies to shield your RBOOM/ RS&BOOM from the wind.
Stategy 0
The conventional wisdom is: the lower down, the better for wind noise. This is because wind slows down near the ground. That suggests, for example, that the crawlspace would be better than the attic.
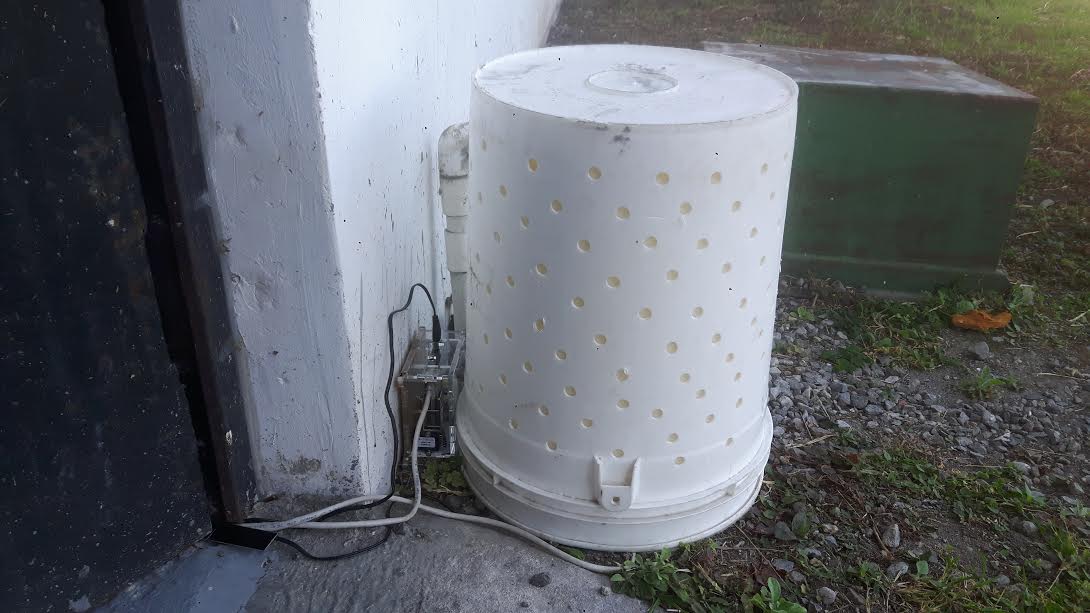
Strategy 1
Take a fake rock or bucket, drill a bunch of holes in it, line it with a porous foam material and locate the RBOOM/ RS&BOOM inside.
Strategy 2
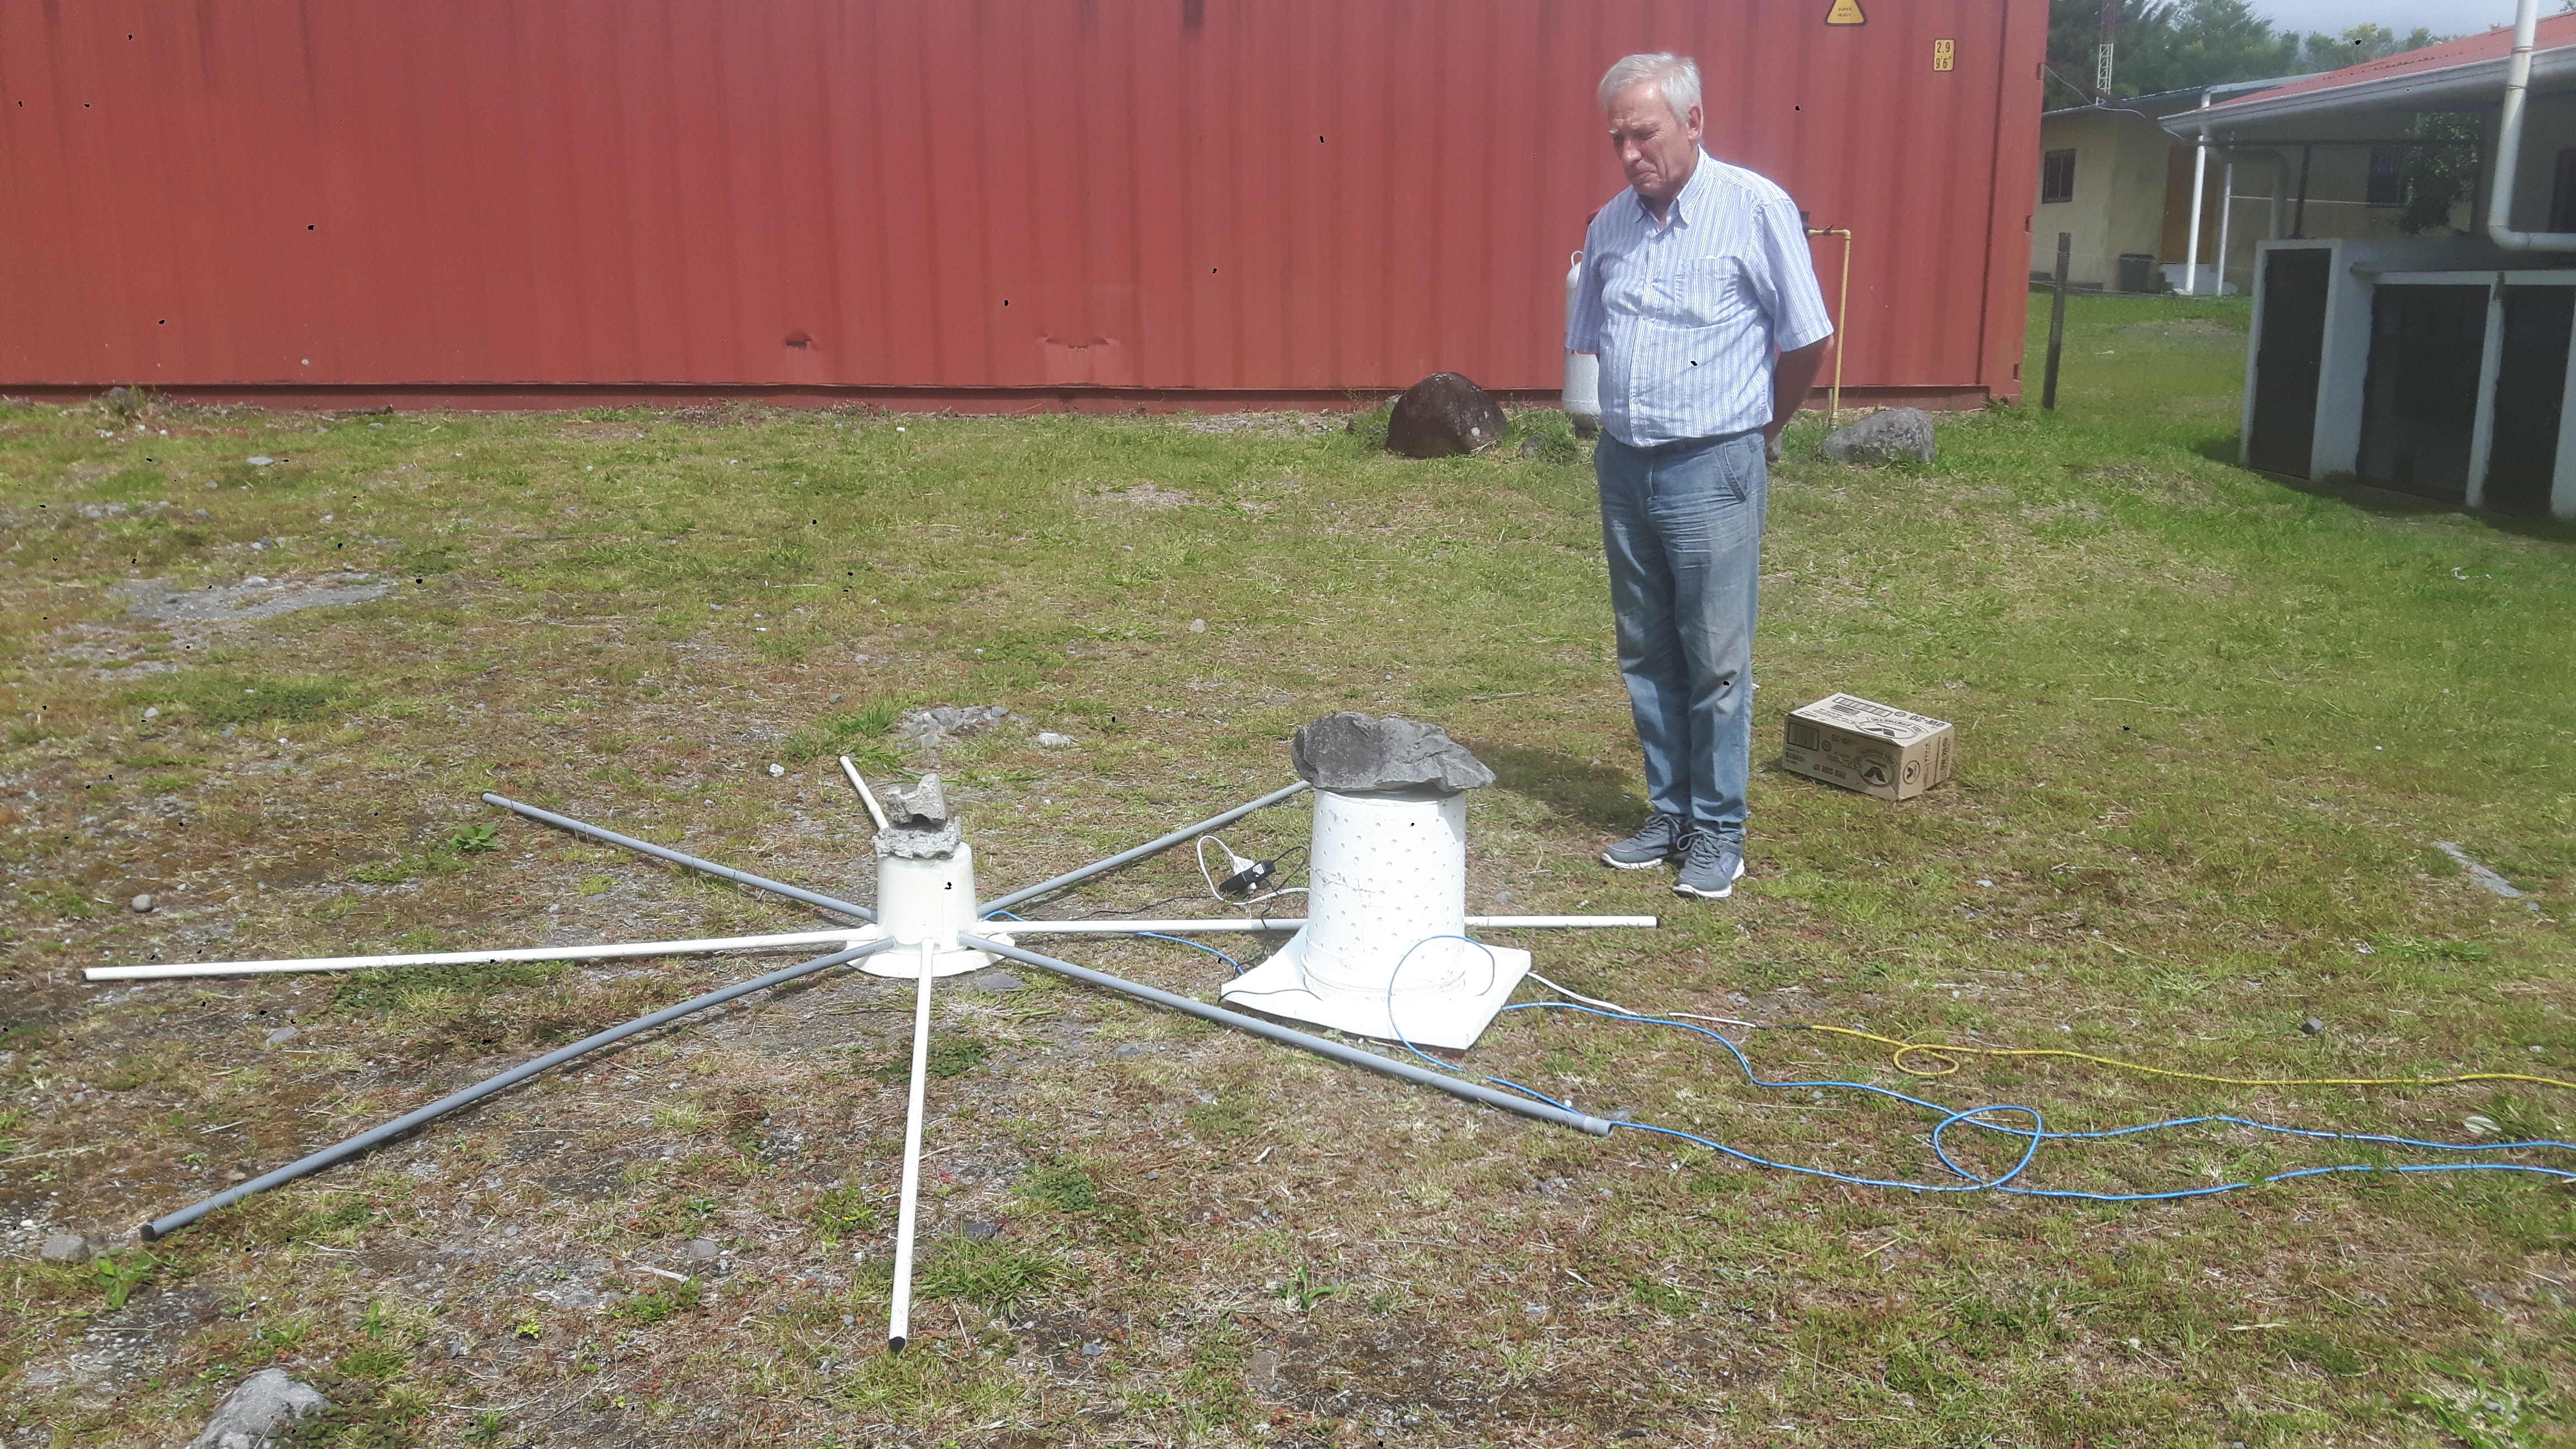
The Comprehensive Nuclear-Test-Ban Treaty Organization (CTBTO) infrasound network employs spatial wind noise averaging systems like those seen in this youTube video and this article. Create your own spatial wind averaging system inspired by the pros at the CTBTO.
These are also known as “pipe arrays”, “porous hoses” or “soaker hoses”.
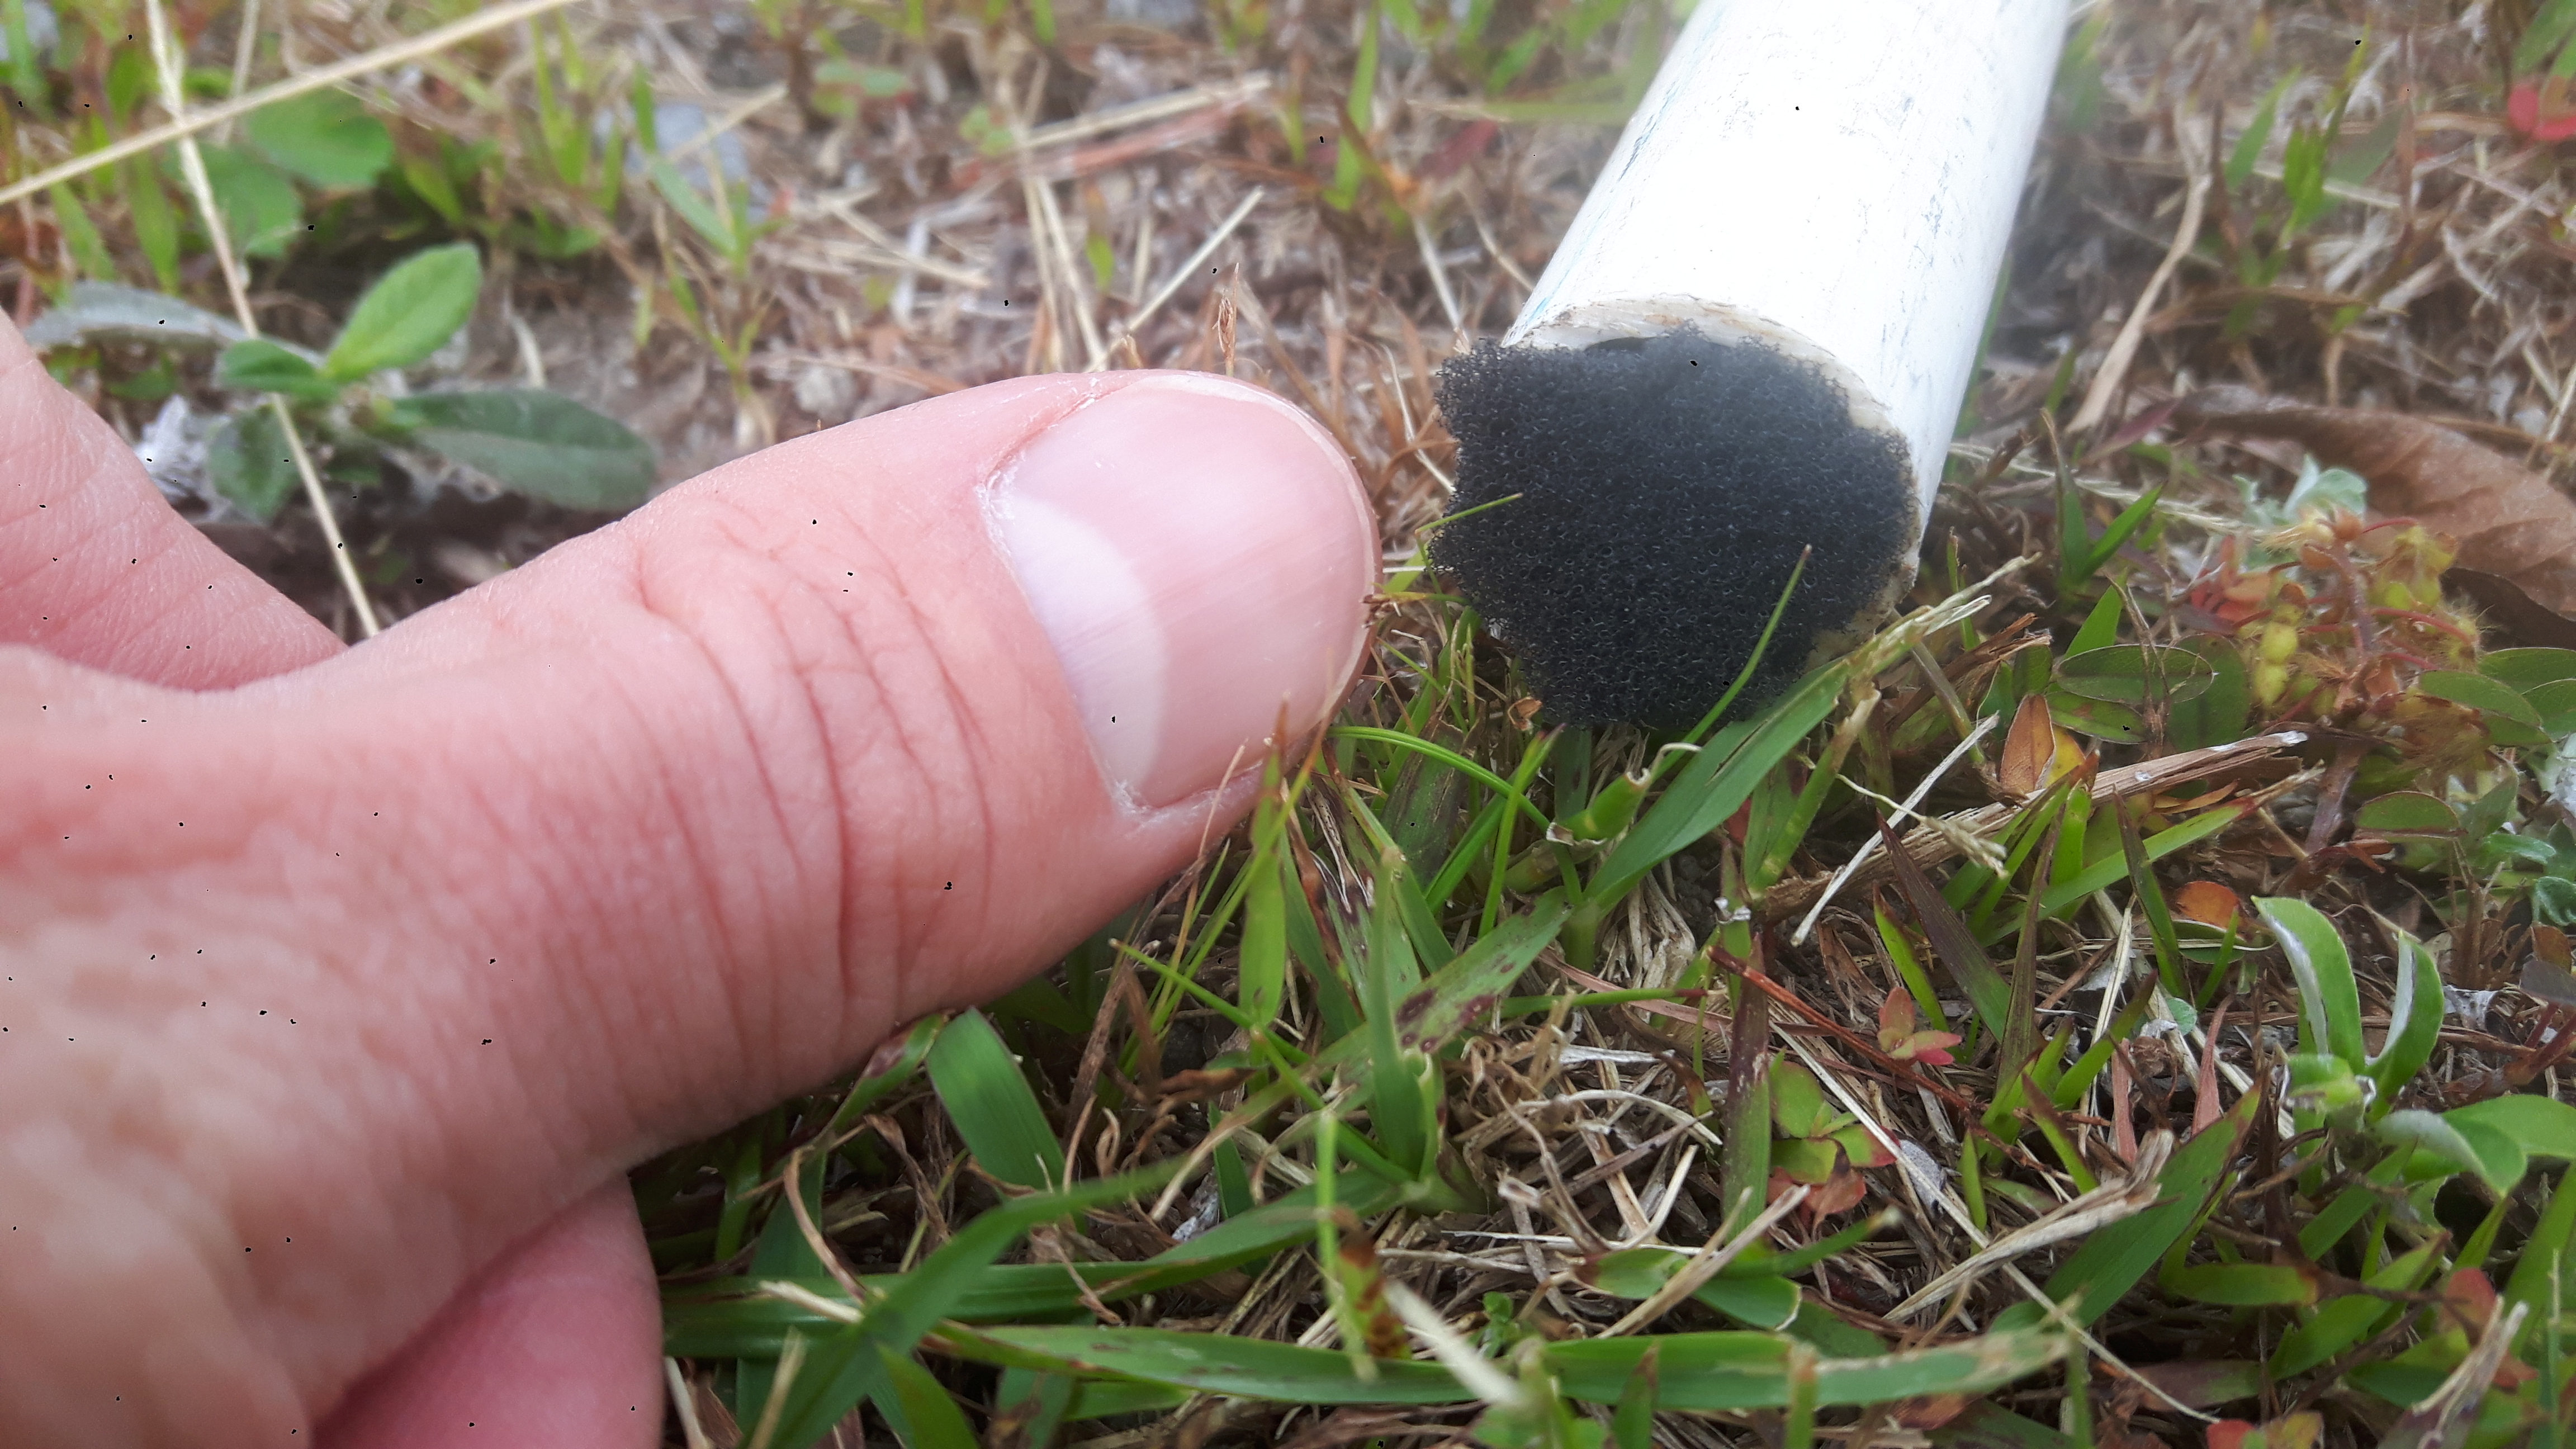
Hint: Fitting the ends of the PVC pipes with a bit of foam dramatically improves wind reduction results.#
Some rules of thumb
Stations located in dense forests usually have acceptable wind-noise levels at all times of the day
The floor of a dense forest is much better than open ground - any wind is intercepted and slowed by the tops of the trees and the branches - well above a sensor on the ground - so the variations in air flow and the pressure changes at ground level are minimized. (Thanks Chris)
An obstruction, like a hedge, typically shows wind reduction for downwind distances of up to ~50x its height. If you don’t have the time to grow a hedge, Chestnut Palling fencing works quite well - this has ~1” vertical Chestnut wood strips held together with twisted wires, top and bottom. It comes in various heights - note that this is a POROUS obstruction - a flat topped wall may generate horizontal air vortices downwind. (Thanks Chris)
Additional Resources
Some resources if you want to really dive deep into wind noise reduction (Thanks Don):
http://slideplayer.com/slide/6018619/ THE AUSTRALIAN NATIONAL UNIVERSITY November 2008, Bermuda WIND NOISE REDUCTION AT IMS INFRASOUND STATIONS Douglas R.
http://slideplayer.com/slide/3616795/ Design and Operation of Infrasound Stations for Hazardous Weather Detection David Pepyne, Sean Klaiber, Jerry Brotzge, and Michael Zink Presented at the.
The pressure transducer used by the RBOOM and RS&BOOM is sensitive to RF at some frequencies. This is what we know:
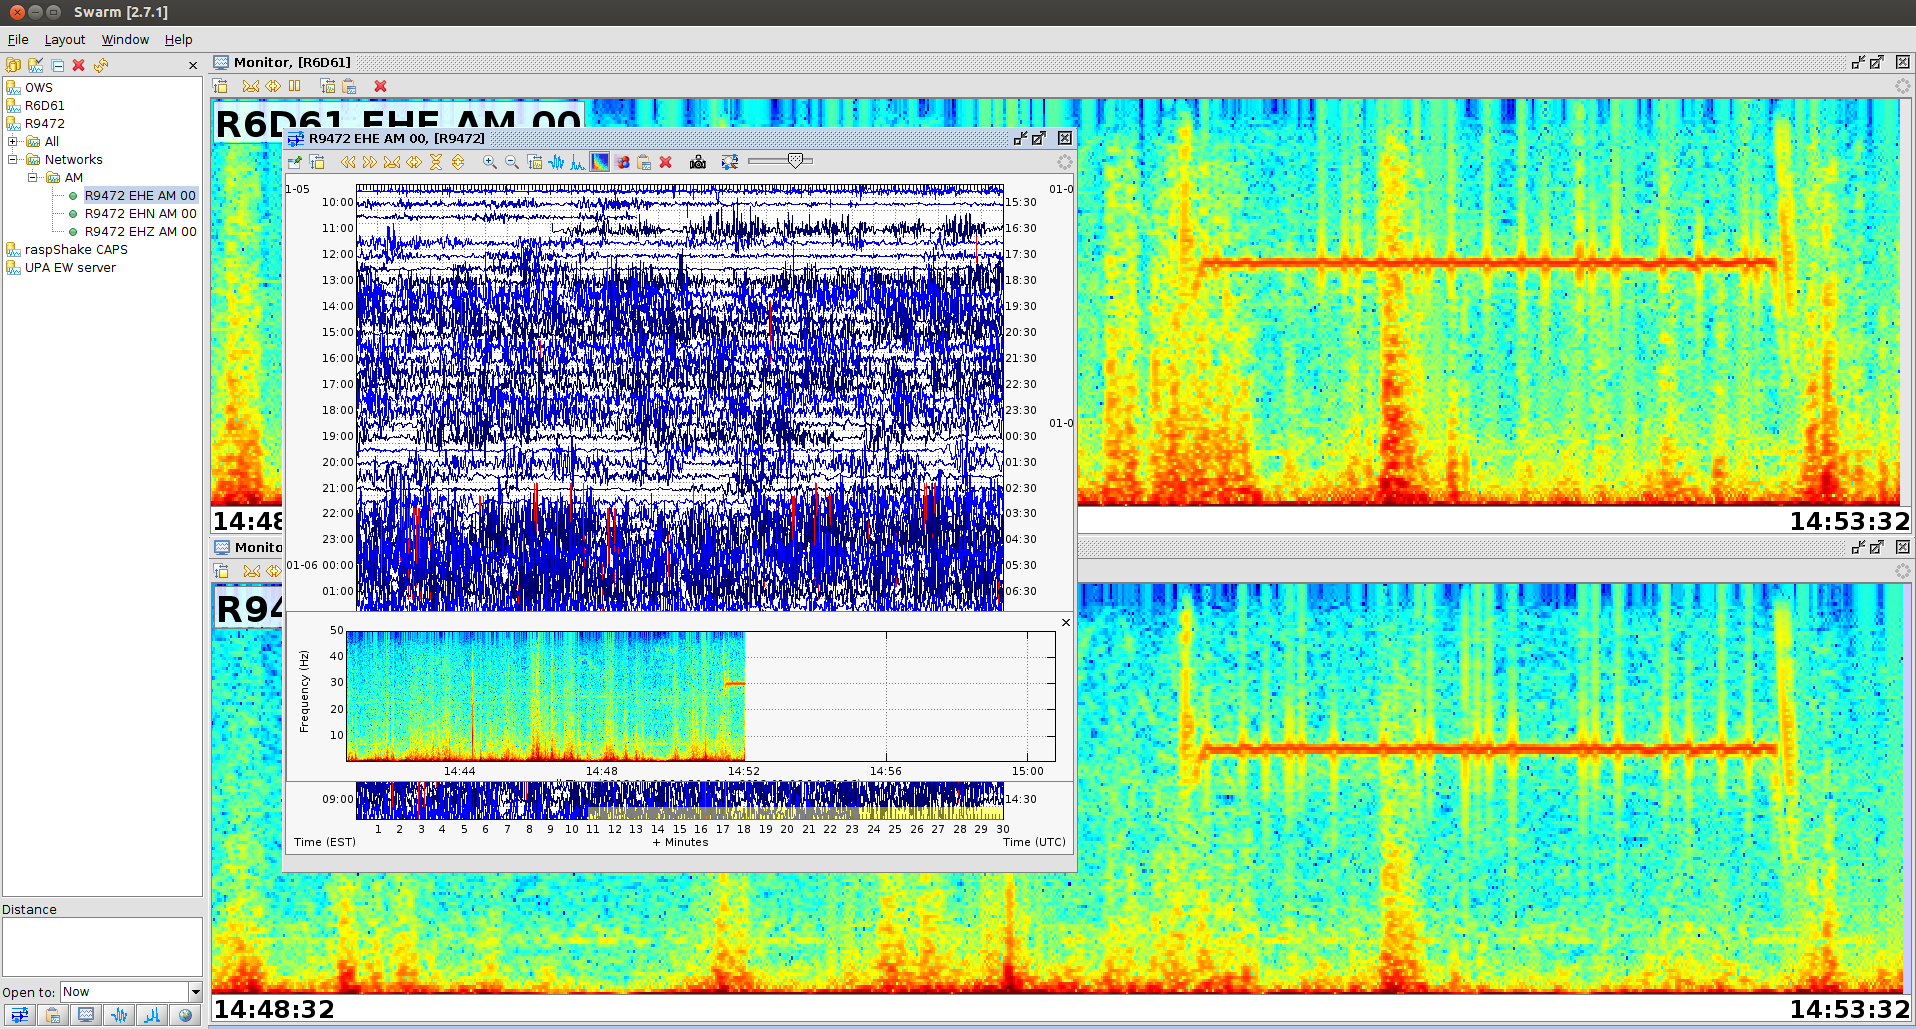
Generally, energy in the 2 GHz and upwards bands can cause spurious tones like those seen below:
The signals must have a power density, for some frequency ranges above 2 GHz, of more then 50 dB above the noise floor. The signal does not need to be continuous. There may be more sensitivity in the 3.0 to 2.9 GHz range.
To give you an idea about the power level required to produce these spurious tones, a typical Ethernet model puts out power in several bands, all within the range of 2.4 GHz to 4.1 GHz (approx.). At 1.5 meters distance, the power level is about 45 dB above the noise floor in the 2.4 to 2.5 GHz region, and in the 4.0 to 4.1 GHz region. This is not enough to cause the spurious tones.
To cause the spurious tones, either the frequencies of the Ethernet modem are wrong or there is not enough energy.
GPRS modems, in our experience, put out frequencies in the 3 to 3.9 GHz range, along with some others and will cause spurious tones.
Generally, if the spurious tones exist, move the system away from any generators (wireless phones, cell phones, modems, microwave ovens, …). If that does not work, enclose the system in a metal box. If that still does not help, replace the Ethernet cable with a higher quality one.
Warning
Attention DIYers! The RBOOM and RS&BOOM boards come with the sensor soldered directly to the top of the board. We strongly advise against changing this. Any cabling you add will pick up RF noise and ruin your measurements.
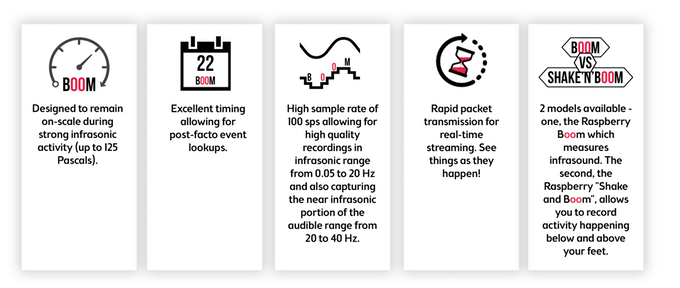
Infrasound is any sound beneath the audible frequency range of the Human ear (20-20,000 Hz). The RBOOM and RS&BOOM detect infrasonic sources from ~0.05 to 20 Hz and audible sources from 20 to 40 Hz.
You will be surprised just how many things actually generate infrasonic signals:
Depending on your geographical location and proximity, you will measure infrasound from different sources. Remember with the Raspberry Shake “StationView” array, you will be able to see activity from all over the world from all the different Raspberry Booms interconnected to our online map! So even if you don’t live in tornado country or on the flanks of an active volcano, you will be able to access data from other users who do.#
This is a work in progress. Click on any image to enlarge.
Notice that most examples are outside of “infrasound” range (0 - 20 Hz) and in “audible” range (>20 Hz). Though, some have signal strength in both ranges.
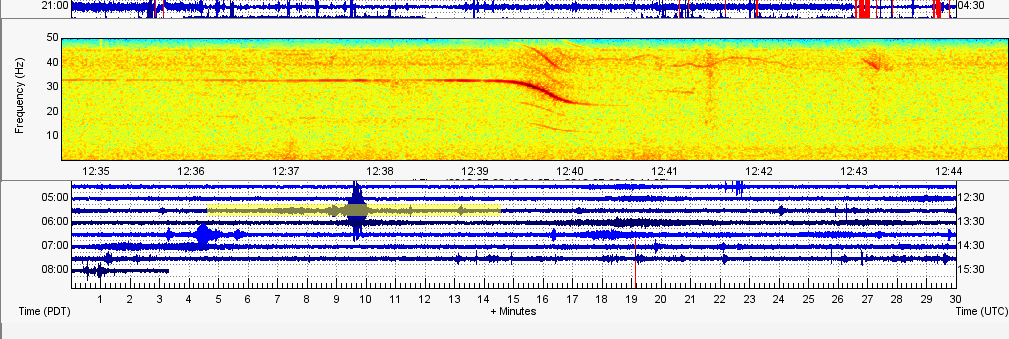
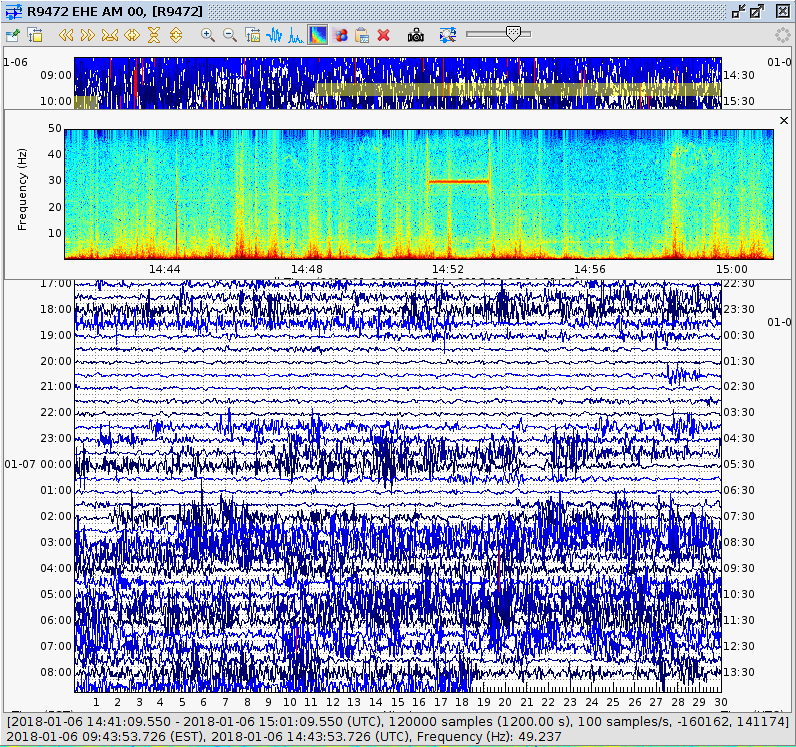
Rocket launch example: Feb, 2018 SpaceX Falcon Heavy from 10 km away, as recorded by the Raspberry Boom
This is a work in progress. Click on any image to enlarge.
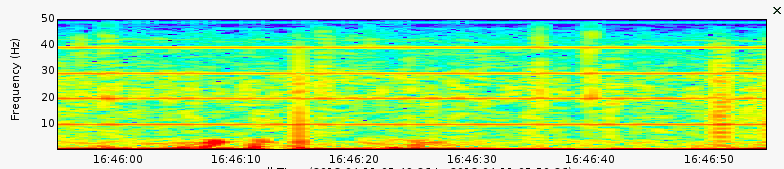
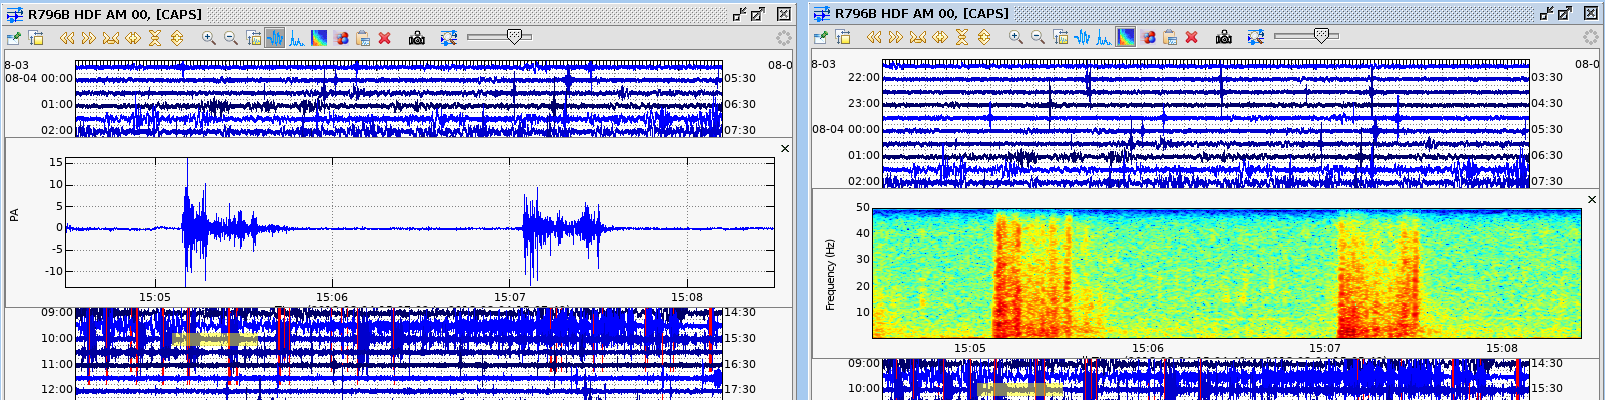
Thunder/ Lightning
Two lightning strikes/ thunder events shown. Note that the onset of the signal is impulsive and fairly broad band. Check the signals out yourself in Swarm: AM.R796B.00.HDF ~15:00 UTC 20180804#
Developed by the Raspberry Shake team, the idea for the RBOOM was originally inspired by Jeffrey Johnson Of Boise State University, an expert in volcano infrasonics with a Ph.D. in Geophysics, who developed his own infrasound sensor called the InfraBSU.